使用 Lynx 以原生速度运行 Sheets
Lynx 是一个现代的跨平台框架。它构建使用 JavaScript 描述布局和事件的 iOS、Android 和 Web 应用。
¥Lynx is a modern cross-platform framework. It builds iOS, Android and Web apps that use JavaScript for describing layouts and events.
SheetJS 是一个用于从电子表格读取和写入数据的 JavaScript 库。
¥SheetJS is a JavaScript library for reading and writing data from spreadsheets.
Lynx 相对较新,目前还没有一个深入的社区。
¥Lynx is relatively new and does not currently have a deep community.
任何问题都应报告给 Lynx 项目以进行进一步诊断。
¥Any issues should be reported to the Lynx project for further diagnosis.
此演示使用 React(使用 ReactLynx)和 SheetJS 来处理和生成电子表格。我们将探讨如何在以下场景中在 Lynx 应用中加载 SheetJS:
¥This demo uses React (using ReactLynx) and SheetJS to process and generate spreadsheets. We'll explore how to load SheetJS in Lynx apps in the following scenarios:
-
"获取远程数据" 使用内置的
fetch下载并解析远程工作簿文件。¥"Fetching Remote Data" uses the built-in
fetchto download and parse remote workbook files.
"获取远程数据" 示例创建了一个如下屏幕截图所示的应用:
¥The "Fetching Remote Data" example creates an app that looks like the screenshots below:
| iOS | Android |
|---|---|
|
|
在测试此演示之前,请遵循官方的 React Lynx 指南![^1]
¥Before testing this demo, follow the official React Lynx Guide![^1]
请按照 iOS(需要 macOS)和 Android 的说明进行操作。它们将涵盖安装和系统配置。你应该能够在 Android 和 iOS(如果适用)模拟器中构建并运行示例应用。
¥Follow the instructions for iOS (requires macOS) and for Android. They will cover installation and system configuration. You should be able to build and run a sample app in the Android and the iOS (if applicable) simulators.
Lynx 开发需要使用 Apple Silicon 芯片的 Macintosh!
¥Lynx development requires an Apple Silicon-powered Macintosh!
集成详情
¥Integration Details
SheetJS NodeJS 模块 可以从应用中的任何组件或脚本导入。
¥The SheetJS NodeJS Module can be imported from any component or script in the app.
内部状态
¥Internal State
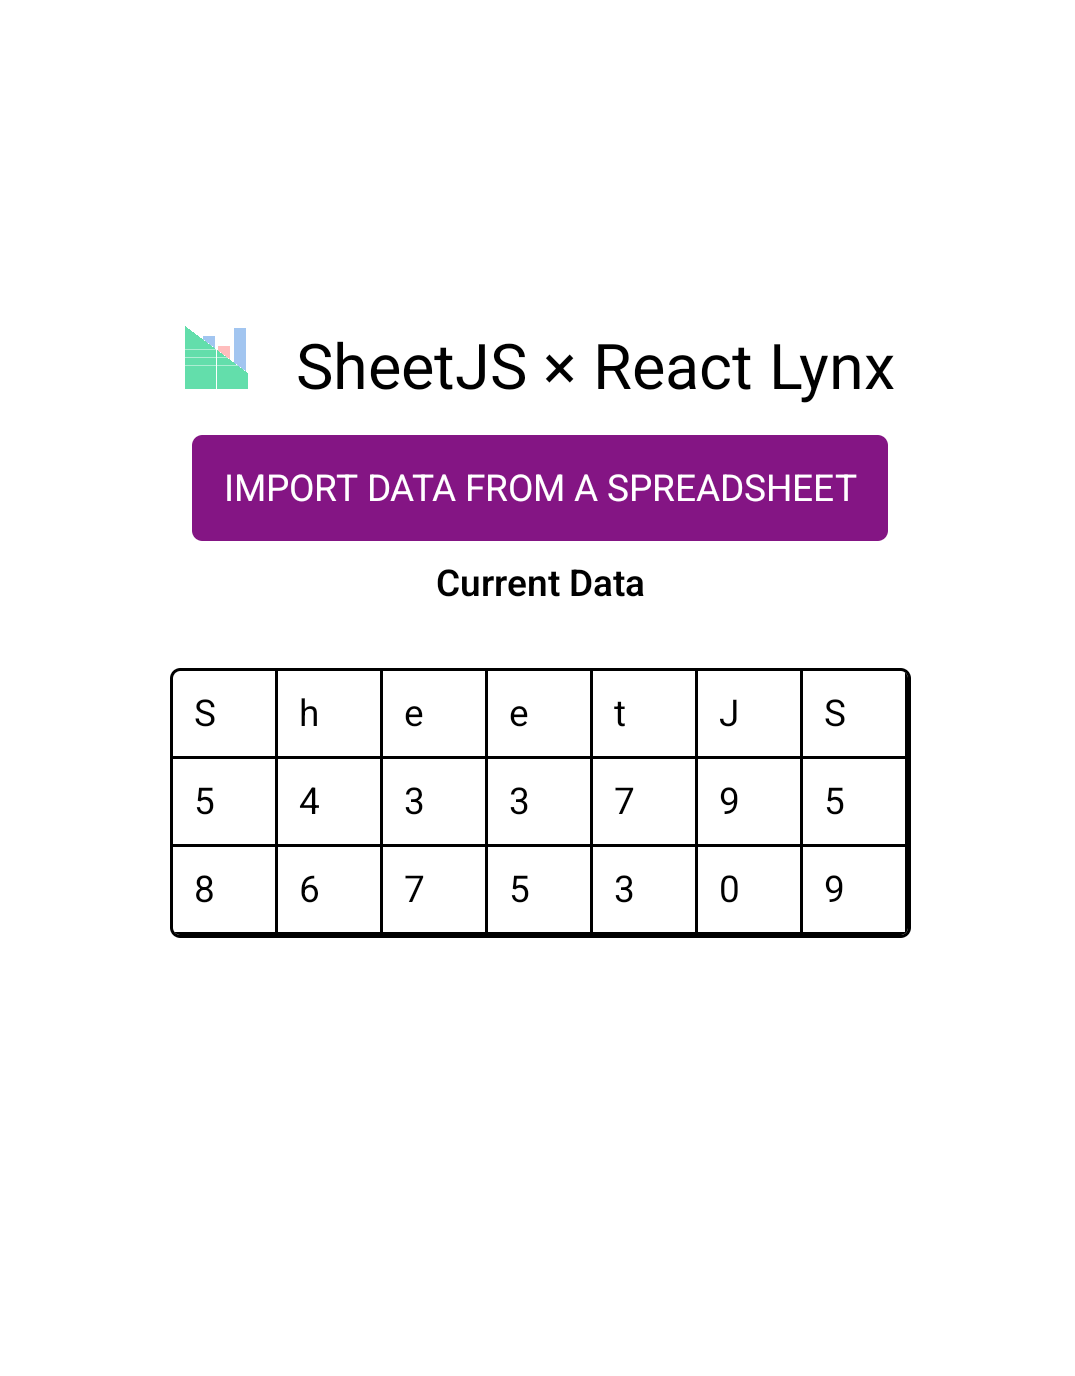
为简单起见,该演示使用 "数组的数组"[^2] 作为内部状态。
¥For simplicity, this demo uses an "Array of Arrays"[^2] as the internal state.
| Spreadsheet | Array of Arrays |
|---|---|
| |
每个数组代表表中的一行。
¥Each array represents a row in the table.
该演示还以单个数字数组的形式跟踪列宽。显示组件使用宽度。
¥This demo also keeps track of the column widths as a single array of numbers. The widths are used by the display component.
const [data, setData] = useState<any[]>([
  "SheetJS".split(""),
  [5, 4, 3, 3, 7, 9, 5],
  [8, 6, 7, 5, 3, 0, 9]
]);
const [widths, setWidths] = useState<number[]>(Array.from({ length: 7 }, () => 20));
更新状态
¥Updating State
从 SheetJS 工作表对象开始,带有 header 选项的 sheet_to_json[^3] 可以生成数组的数组:
¥Starting from a SheetJS worksheet object, sheet_to_json[^3] with the header
option can generate an array of arrays:
/* assuming `wb` is a SheetJS workbook */
function update_state(wb) {
  /* convert first worksheet to AOA */
  const wsname = wb.SheetNames[0];
  const ws = wb.Sheets[wsname];
  const data = utils.sheet_to_json(ws, {header:1});

  /* update state */
  setData(data);

  /* update column widths */
  setWidths(make_width(data));
}
计算列宽
¥Calculating Column Widths
可以通过遍历每列并计算最大数据宽度来计算列宽度。使用数组的数组:
¥Column widths can be calculated by walking each column and calculating the max data width. Using the array of arrays:
/* this function takes an array of arrays and generates widths */
function make_width(aoa) {
  /* walk each row */
  aoa.forEach((r) => {
    /* walk each column */
    r.forEach((c, C) => {
      /* update column width based on the length of the cell contents */
      res[C] = Math.max(res[C]||60, String(c).length * 10);
    });
  });
  /* use a default value for columns with no data */
  for(let C = 0; C < res.length; ++C) if(!res[C]) res[C] = 60;
  return res;
}
显示数据
¥Displaying Data
Lynx 不附带用于显示表格数据的组件。
¥Lynx does not ship with a component for displaying tabular data.
该演示程序使用 Lynx <view/> 和 <text/> 元素来显示表格数据:
¥The demo uses Lynx <view/> and <text/> elements to display tabular data:
{/* Table container */}
<view className='Table'>
  {/* Map through each row in the data array */}
  {data.map((row, rowIndex) => (
    <view key={`row-${rowIndex}`} className="Row">
      {/* Map through each cell in the current row */}
      {Array.isArray(row) && row.map((cell, cellIndex) => (
        {/* Cell with dynamic width based on content */}
        <view
          key={`cell-${rowIndex}-${cellIndex}`}  className="Cell"
          style={{ width: `${widths[cellIndex]}px` }}>
          {/* Display cell content as text */}
          <text>{String(cell)}</text>
        </view>
      ))}
    </view>
  ))}
</view>
获取远程数据
¥Fetching Remote Data
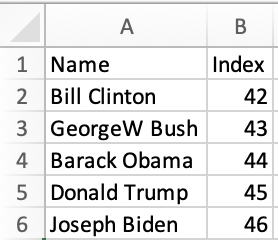
此代码片段下载并解析 https://xlsx.nodejs.cn/pres.xlsx:
¥This snippet downloads and parses https://xlsx.nodejs.cn/pres.xlsx:
/* fetch data into an ArrayBuffer */
const ab = await (await fetch("https://xlsx.nodejs.cn/pres.xlsx")).arrayBuffer();
/* parse data */
const wb = XLSX.read(ab);
获取演示
¥Fetch Demo
本 demo 在以下环境下进行了测试:
¥This demo was tested in the following environments:
模拟器
¥Simulators
| OS | 设备 | Lynx | LynxExplorer | 开发平台 | 日期 |
|---|---|---|---|---|---|
| Android 35 | 像素 3a | 0.8.6 | 3.2.0-rc.1 | darwin-arm | 2025-03-26 |
| iOS 18.3 | iPhone 16 Pro | 0.8.6 | 3.2.0-rc.1 | darwin-arm | 2025-03-26 |
上次测试此演示时,没有关于在真实设备上运行 Lynx 应用的简单独立指南。
¥When this demo was last tested, there was no simple standalone guide for running Lynx apps on real devices.
首先按照指南 [^1] 安装 Lynx。
¥First install Lynx by following the Guide![^1].
继续之前,请确保你可以在模拟器上运行一个基本的测试应用!
¥Make sure you can run a basic test app on your simulator before continuing!
-
安装 Lynx 依赖
¥Install Lynx dependencies
-
创建项目:
¥Create project:
npm create rspeedy@0.8.6 -- -d SheetJSLynxFetch -t react-ts --tools biome
-
安装共享依赖:
¥Install shared dependencies:
cd SheetJSLynxFetch
curl -o ./src/assets/SheetJS-logo.png https://xlsx.nodejs.cn/logo.png
npm i
npm i -S https://cdn.sheetjs.com/xlsx-0.20.3/xlsx-0.20.3.tgz
curl -o ./src/App.tsx https://xlsx.nodejs.cn/lynx/App.tsx
curl -o ./src/App.css https://xlsx.nodejs.cn/lynx/App.css
-
启动开发服务器:
¥Start the development server:
npm run dev
保持窗户打开。
¥Keep the window open.
安卓
¥Android
-
启动 Android 模拟器:
¥Start the Android emulator:
- Android Studio
- Command Line
在 Android Studio 中,单击 "更多操作" > "虚拟设备管理器"。在列表中查找模拟设备,然后单击 ▶ 按钮进行播放。
¥In Android Studio, click "More actions" > "Virtual Device Manager". Look for the emulated device in the list and click the ▶ button to play.
列出带有 emulator -list-avds 的可用模拟器:
¥List the available emulators with emulator -list-avds:
shjs@sheetjs SheetJSLynxFetch % emulator -list-avds
Medium_Phone_API_35
^^^^^^^^^^^^^^^^^^^--- emulator name
模拟器名称应传递给 emulator -avd。在之前的测试中,名称为 Medium_Phone_API_35,启动命令为:
¥The emulator name should be passed to emulator -avd. In a previous test, the
name was Medium_Phone_API_35 and the launch command was:
emulator -avd Medium_Phone_API_35
在 macOS 上,~/Library/Android/sdk/emulator/ 是 emulator 二进制文件的典型位置。如果找不到,则将该文件夹添加到 PATH:
¥On macOS, ~/Library/Android/sdk/emulator/ is the typical location
for the emulator binary. If it cannot be found, add the folder to PATH:
export PATH="$PATH":~/Library/Android/sdk/emulator
emulator -avd Medium_Phone_API_35
-
下载 LynxExplorer[^4] APK。
¥Download the LynxExplorer[^4] APK.
最新测试使用了 LynxExplorer-noasan-release.apk for version 3.2.0-rc.1。
¥The latest test used LynxExplorer-noasan-release.apk for version 3.2.0-rc.1.
-
将 APK 拖放到 Android 模拟器窗口中。
¥Drag and drop the APK into the Android emulator window.
模拟器将安装 LynxExplorer。
¥The emulator will install LynxExplorer.
-
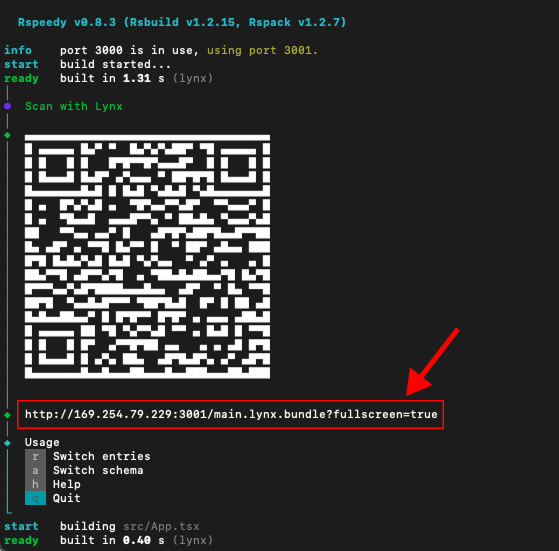
在 步骤 5 的终端窗口中,复制 HTTP 链接。它将打印在二维码下方,如下图所示:
¥In the terminal window from step 5, copy the HTTP link. It will be printed below the QR code, as shown in the following screenshot:
-
在模拟器中,打开 "LynxExplorer" 应用。
¥In the emulator, open the "LynxExplorer" app.
-
在“输入卡片 URL”输入字段中,粘贴链接。点击“开始”。
¥In the Enter Card URL input field, paste the link. Tap Go.
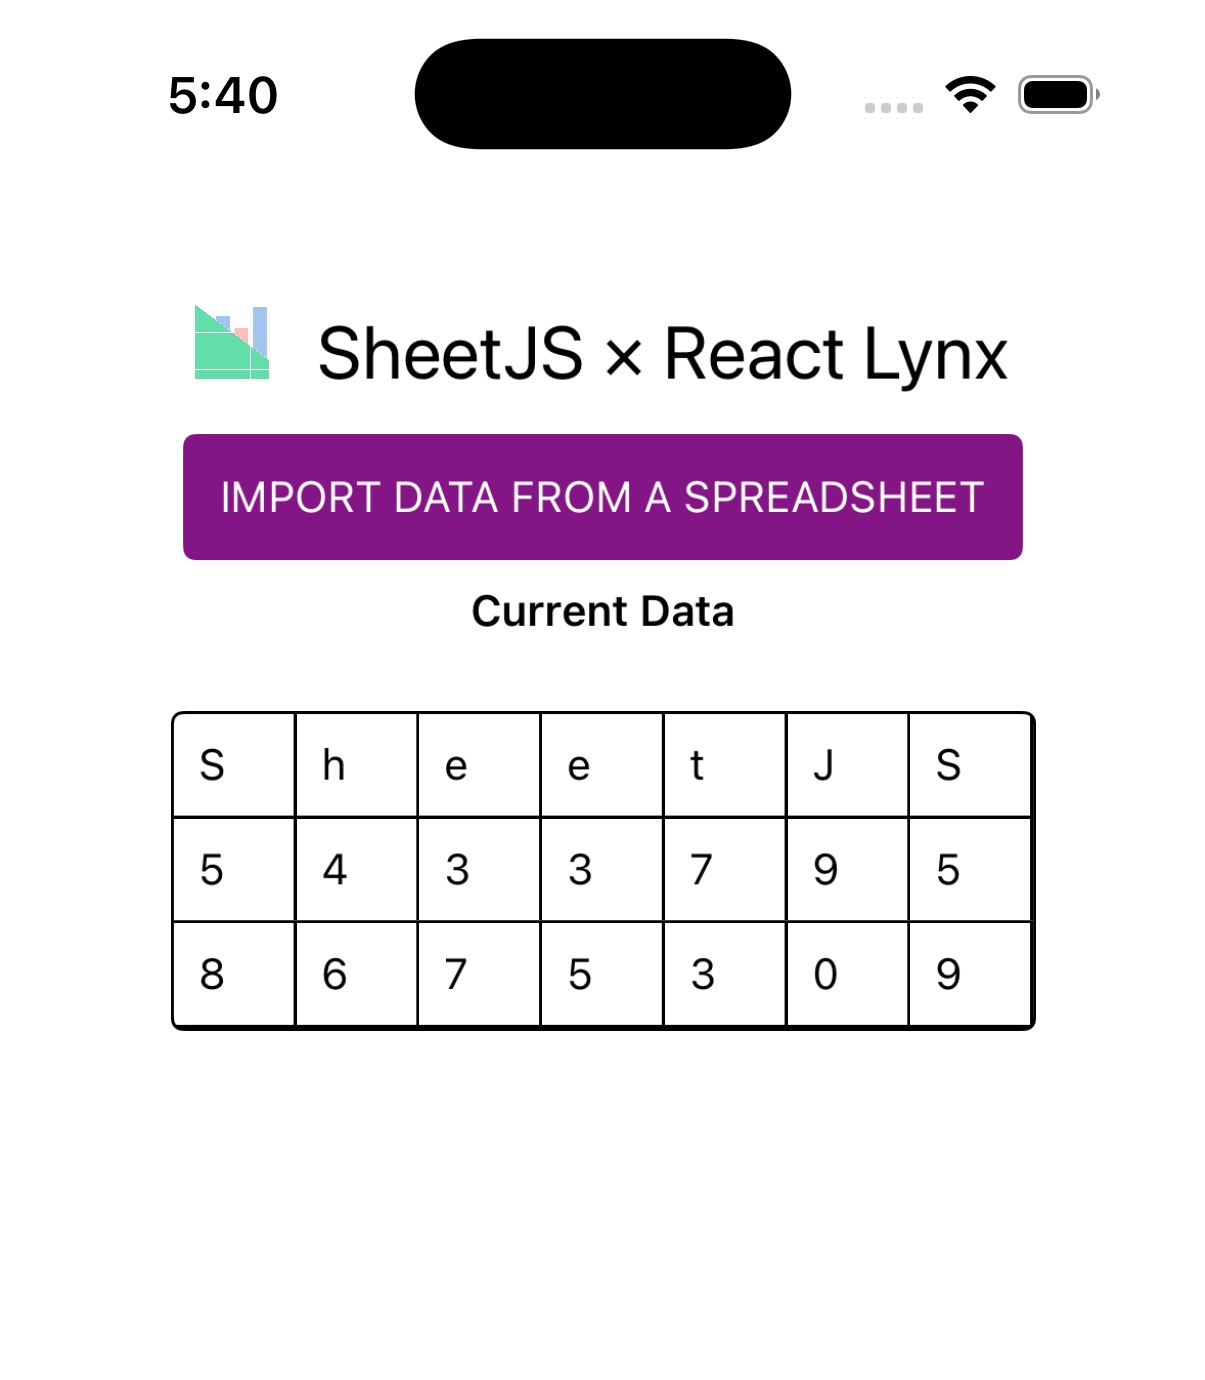
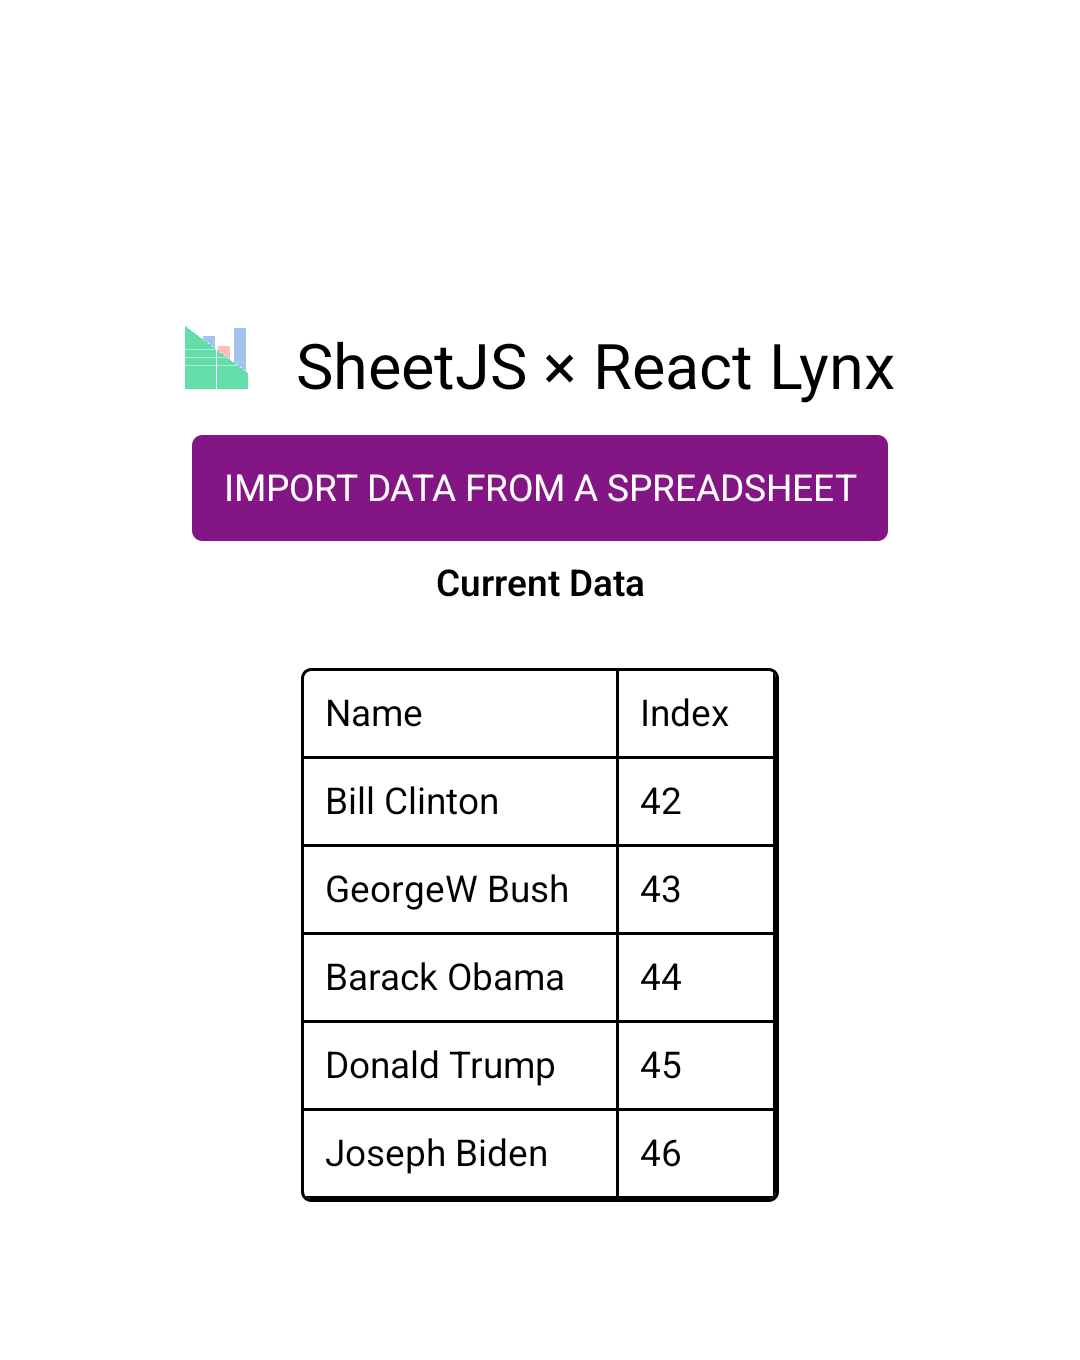
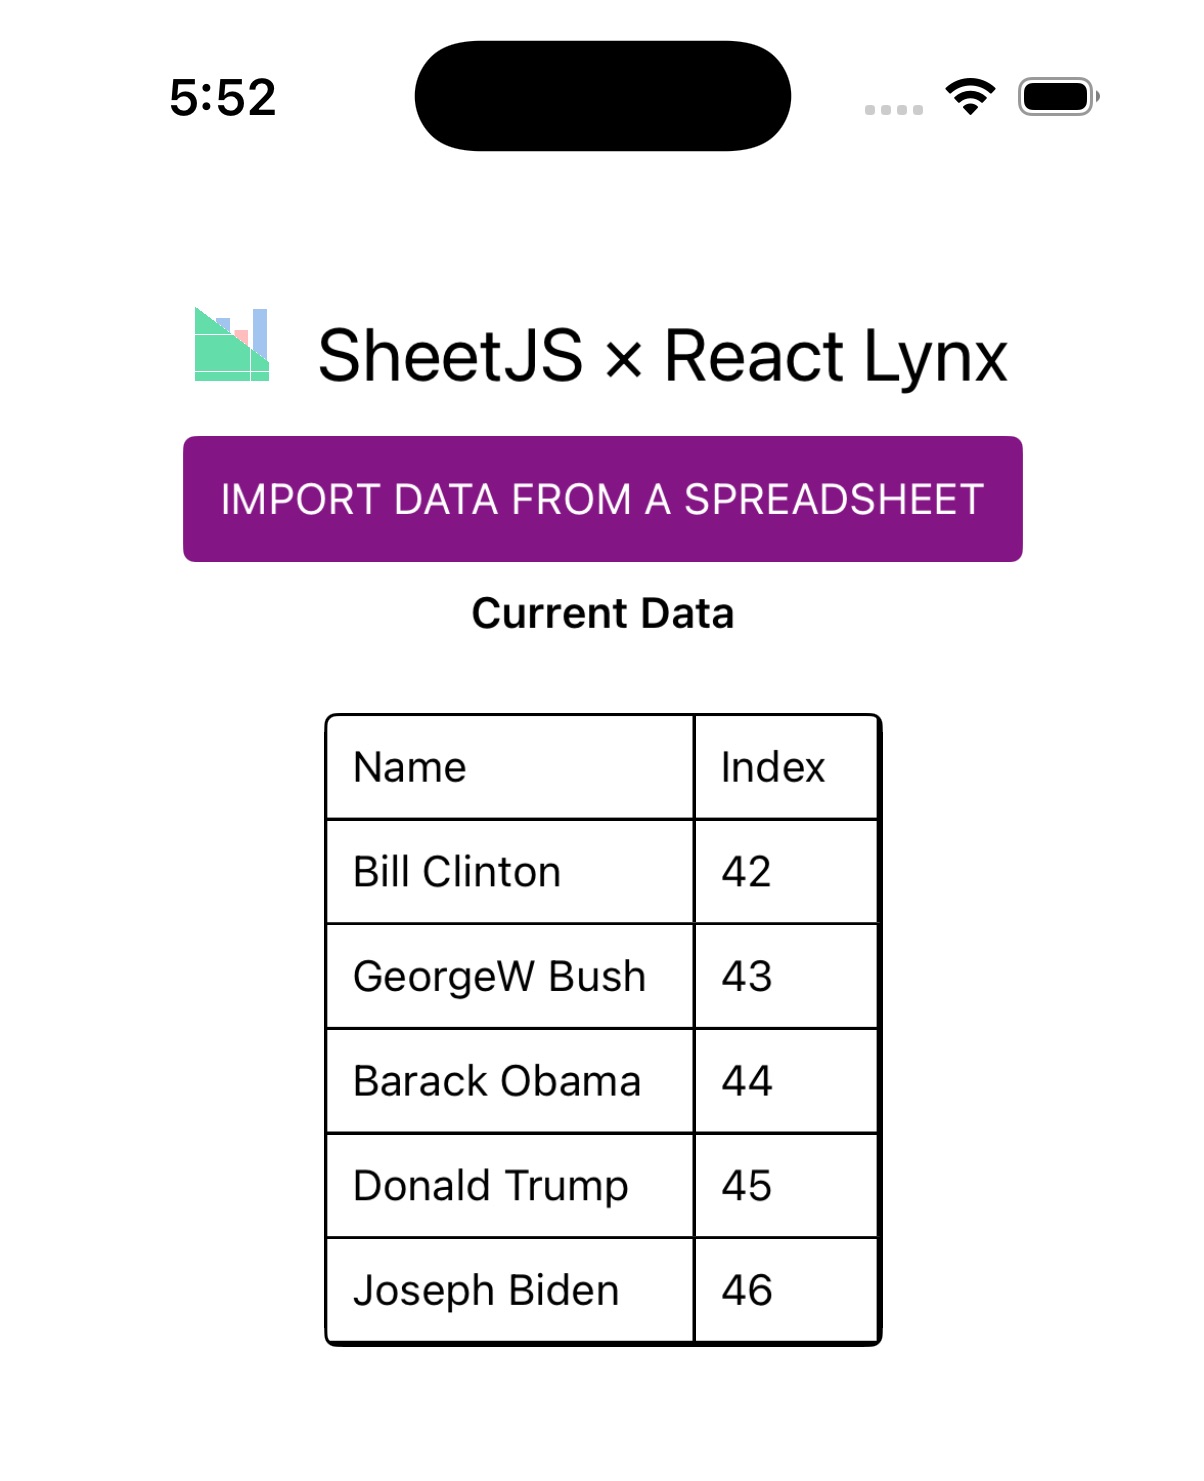
视图将会刷新。应用应如 "之前" 屏幕截图所示:
¥The view will refresh. The app should look like the "Before" screenshot:
| Before | After |
|---|---|
|
|
-
点击 "从电子表格导入数据" 并确认应用显示新数据。应用应如 "之后" 屏幕截图所示。
¥Tap "Import data from a spreadsheet" and verify that the app shows new data. The app should look like the "After" screenshot.
iOS 测试
¥iOS Testing
iOS 测试只能在运行 macOS 的 Apple 硬件上执行!
¥iOS testing can only be performed on Apple hardware running macOS!
Xcode 和 iOS 模拟器在 Windows 或 Linux 上不可用。
¥Xcode and iOS simulators are not available on Windows or Linux.
-
下载 LynxExplorer[^4] 应用包。
¥Download the LynxExplorer[^4] app tarball.
最新测试使用了 LynxExplorer-arm64.app.tar.gz for version 3.2.0-rc.1。
¥The latest test used LynxExplorer-arm64.app.tar.gz for version 3.2.0-rc.1.
-
使用 Finder 打开
LynxExplorer-arm64.app.tar.gz。¥Open
LynxExplorer-arm64.app.tar.gzusing Finder.
tarball 包含一个名为 LynxExplorer-arm64 的应用。
¥The tarball contains an app named LynxExplorer-arm64 .
-
启动 iOS 模拟器。
¥Launch the iOS Simulator.
-
点击
LynxExplorer-arm64并将其拖到模拟器窗口中。¥Click and drag
LynxExplorer-arm64into the Simulator window.
模拟�器将安装 "LynxExplorer" 应用。
¥The simulator will install the "LynxExplorer" app.
-
点击模拟器中的 "LynxExplorer" 图标启动应用。
¥Tap the "LynxExplorer" icon in the simulator to launch the app.
-
点击“输入卡片 URL”输入框并粘贴链接。点击“开始”。
¥Tap the Enter Card URL input field and paste the link. Tap Go.
视图将会刷新。应用应如 "之前" 屏幕截图所示:
¥The view will refresh. The app should look like the "Before" screenshot:
| Before | After |
|---|---|
|
|
-
点击 "从电子表格导入数据" 并确认应用显示新数据。应用应如 "之后" 屏幕截图所示。
¥Tap "Import data from a spreadsheet" and verify that the app shows new data. The app should look like the "After" screenshot.
[^1]: 按照 Lynx 文档中的 "快速开始" 操作,并选择合适的 "Lynx Explorer 沙盒"。
¥Follow "Quick Start" in the Lynx documentation and select the appropriate "Lynx Explorer sandbox"
[^2]: 见 API 参考中的 "数组的数组"
¥See "Array of Arrays" in the API reference
[^3]: 见 "数组输出" 于 "实用函数"
¥See "Array Output" in "Utility Functions"
[^4]: 见 "LynxExplorer 沙盒"