Quasar Apps 中的数据
Quasar 是一个 VueJS 框架,用于使用 Cordova 平台构建 iOS 和 Android 应用。
¥Quasar is a VueJS framework for building iOS and Android apps with the Cordova platform.
SheetJS 是一个用于从电子表格读取和写入数据的 JavaScript 库。
¥SheetJS is a JavaScript library for reading and writing data from spreadsheets.
该演示使用 Quasar 和 SheetJS 来处理数据并生成电子表格。我们将探讨如何在 Quasar 应用中加载 SheetJS,并使用 Quasar 和 Cordova 功能从设备上的电子表格中提取数据并向其中写入数据。
¥This demo uses Quasar and SheetJS to process data and generate spreadsheets. We'll explore how to load SheetJS in an Quasar app and use Quasar and Cordova features to extract data from, and write data to, spreadsheets on the device.
"演示" 创建一个应用,如下图所示:
¥The "Demo" creates an app that looks like the screenshots below:
| iOS | Android |
|---|---|
|
|
本 demo 在以下环境下进行了测试:
¥This demo was tested in the following environments:
真实设备
¥Real Devices
| OS | 设备 | Quasar | 日期 |
|---|---|---|---|
| 安卓 34 | 英伟达盾 | 2.18.1 | 2025-04-17 |
| iOS 15.1 | iPad Pro | 2.18.1 | 2025-04-17 |
模拟器
¥Simulators
| OS | 设备 | Quasar | 开发平台 | 日期 |
|---|---|---|---|---|
| Android 35 | Pixel 9 Pro XL | 2.18.1 | darwin-arm | 2025-04-17 |
| iOS 18.2 | iPhone 16 Pro Max | 2.18.1 | darwin-arm | 2025-04-17 |
| Android 36 | Pixel 9 Pro XL | 2.18.1 | win11-x64 | 2025-04-17 |
集成详情
¥Integration Details
SheetJS NodeJS 模块 可以从应用中的任何组件或脚本导入。
¥The SheetJS NodeJS Module can be imported from any component or script in the app.
该演示将使用 Quasar ViteJS 入门项目以及 VueJS 和 Cordova。启动器将支持的 Cordova 项目放置在 src-cordova 文件夹中。
¥This demo will use the Quasar ViteJS starter project with VueJS and Cordova.
The starter places the backing Cordova project in the src-cordova folder.
完整的解决方案使用 cordova-plugin-file 进行文件操作。可以从 Cordova 文件夹安装:
¥The complete solution uses cordova-plugin-file for file operations. It can
be installed from the Cordova folder:
cd src-cordova
cordova plugin add cordova-plugin-file
cd ..
读取数据
¥Reading data
QFile[^1] 组件提供了一个类似于文件输入元素的 API:
¥The QFile[^1] component presents an API reminiscent of File Input elements:
<q-file label="Load File" filled label-color="orange" @input="updateFile"/>
绑定到 input 元素时,回调会接收 Event 对象。使用标准 DOM 操作,可以将文件数据拉入 ArrayBuffer 并使用 SheetJS read 方法 [^2] 进行解析。read 返回一个 workbook[^3] 对象,该对象保存每个工作表的数据和元数据。
¥When binding to the input element, the callback receives an Event object.
Using standard DOM operations, the file data can be pulled into an ArrayBuffer
and parsed using the SheetJS read method[^2]. read returns a workbook[^3]
object that holds data and metadata for each worksheet.
此代码片段读取工作簿,提取第一个工作表,使用 SheetJS sheet_to_json[^4] 方法生成对象数组,并更新状态:
¥This snippet reads a workbook, pulls the first worksheet, generates an array of
objects using the SheetJS sheet_to_json[^4] method, and updates state:
import { read } from 'xlsx';

// assuming `todos` is a standard VueJS `ref`
async function updateFile(v) { try {
  // `v.target.files[0]` is the desired file object
  const files = (v.target as HTMLInputElement).files;
  if(!files || files.length == 0) return;

  // read first file
  const wb = read(await files[0].arrayBuffer());

  // get data of first worksheet as an array of objects
  const data = utils.sheet_to_json(wb.Sheets[wb.SheetNames[0]]);

  // update state
  todos.value = data.map(row => ({id: row.Index, content: row.Name}));

} catch(e) { console.log(e); } }
写入数据
¥Writing data
SheetJS json_to_sheet 方法 [^5] 从对象数组开始生成一个 SheetJS 工作表对象。book_append_sheet 和 book_new 辅助函数 [^6] 创建一个可以导出的 SheetJS 工作簿对象:
¥Starting from an array of objects, the SheetJS json_to_sheet method[^5]
generates a SheetJS worksheet object. The book_append_sheet and book_new
helper functions[^6] create a SheetJS workbook object that can be exported:
import { utils } from 'xlsx';

// assuming `todos` is a VueJS ref whose value is an array of objects
const ws = utils.json_to_sheet(todos.value);
const wb = utils.book_new();
utils.book_append_sheet(wb, ws, "SheetJSQuasar");
带有选项 type: "buffer" 的 SheetJS write 函数 [^7] 将生成可以转换为 blob 并导出的 Uint8Array 对象:
¥The SheetJS write function[^7] with the option type: "buffer" will generate
Uint8Array objects that can be converted to blobs and exported:
import { write } from 'xlsx';

// on iOS and android, `XLSX.write` with type "buffer" returns a `Uint8Array`
const u8: Uint8Array = write(wb, {bookType: "xlsx", type: "buffer"});
cordova-plugin-file API 将数据写入文件系统。该代码使用文件和目录条目 API[^8]:
¥The cordova-plugin-file API writes the data to the filesystem. The code uses
the File and Directory Entries API[^8]:
// Request filesystem access for persistent storage
window.requestFileSystem(window.PERSISTENT, 0, function(fs) {
  // Request a handle to "SheetJSQuasar.xlsx", making a new file if necessary
  fs.root.getFile("SheetJSQuasar.xlsx", {create: true}, entry => {
    // Request a FileWriter for writing data
    entry.createWriter(writer => {
      // The FileWriter API needs an actual Blob
      const data = new Blob([u8], {type: "application/vnd.ms-excel"});
      // This callback is called if the write is successful
      writer.onwriteend = () => {
        // TODO: show a dialog
      };
      // writer.onerror will be invoked if there is an error in writing

      // write the data
      writer.write(data);
    });
  });
});
演示
¥Demo
该演示取自 ViteJS 示例。假定熟悉 VueJS 和 TypeScript。
¥The demo draws from the ViteJS example. Familiarity with VueJS and TypeScript is assumed.
平台设置
¥Platform Setup
-
确保所有依赖均已安装。全局安装 CLI:
¥Ensure all of the dependencies are installed. Install the CLI globally:
npm i -g @quasar/cli cordova
在某些系统中,必须以 root 用户身份运行该命令:
¥In some systems, the command must be run as the root user:
sudo npm i -g @quasar/cli cordova
Installation Notes (click to show)
Quasar requires Java 17
基础项目
¥Base Project
-
创建一个新应用:
¥Create a new app:
npm init quasar
提示时:
¥When prompted:
-
"你想构建什么?":
App with Quasar CLI, let's go!¥"What would you like to build?":
App with Quasar CLI, let's go! -
"项目文件夹":
SheetJSQuasar¥"Project folder":
SheetJSQuasar -
"选择脚本类型":
Typescript¥"Pick script type":
Typescript -
"选择 Quasar App CLI 变体":
Quasar App CLI with Vite¥"Pick Quasar App CLI variant":
Quasar App CLI with Vite -
"包名字":(按 Enter,它将使用默认的
sheetjsquasar)¥"Package name": (press Enter, it will use the default
sheetjsquasar) -
"项目产品名称":
SheetJSQuasar¥"Project product name":
SheetJSQuasar -
"项目介绍":
SheetJS + Quasar¥"Project description":
SheetJS + Quasar -
"选择 Vue 组件样式":
Composition API with <script setup>¥"Pick a Vue component style":
Composition API with <script setup> -
"选择你的 CSS 预处理器":
None¥"Pick your CSS preprocessor":
None -
"检查你的项目所需的功能":取消选择所有内容(向下滚动到每个选定的项目并按 Space)
¥"Check the features needed for your project": Deselect everything (scroll down to each selected item and press Space)
-
"安装项目依赖":
Yes, use npm¥"Install project dependencies":
Yes, use npm
-
安装依赖:
¥Install dependencies:
cd SheetJSQuasar
npm i
npm i --save https://cdn.sheetjs.com/xlsx-0.20.3/xlsx-0.20.3.tgz
-
设置科尔多瓦:
¥Set up Cordova:
npx cordova telemetry off
npx quasar mode add cordova
npx quasar mode remove capacitor
出现提示时,输入应用 ID org.sheetjs.quasar。
¥When prompted, enter the app id org.sheetjs.quasar.
-
将对话框插件添加到
quasar.config.ts中的plugins数组:¥Add the Dialog plugin to the
pluginsarray inquasar.config.ts:
      // Quasar plugins
      plugins: ['Dialog']
-
下载
IndexPage.vue并替换现有的页面脚本src/pages/IndexPage.vue:¥Download
IndexPage.vueand replace the existing page scriptsrc/pages/IndexPage.vue:
curl -L -o src/pages/IndexPage.vue https://xlsx.nodejs.cn/quasar/IndexPage.vue
安卓
¥Android
-
创建 Android 项目:
¥Create the Android project:
cd src-cordova
npx cordova platform add android
npx cordova plugin add cordova-plugin-wkwebview-engine
npx cordova plugin add cordova-plugin-file
cd ..
-
启动模拟器:
¥Start the simulator:
npx quasar dev -m cordova -T android
如果提示选择外部 IP,请按 Enter。
¥If prompted to select an external IP, press Enter.
如果应用为空白或不刷新,请删除该应用并关闭模拟器,然后重新启动开发过程。
¥If the app is blank or not refreshing, delete the app and close the simulator, then restart the development process.
在某些测试运行中,命令失败并出现 Gradle 错误
¥In some test runs, the command failed with a Gradle error
Could not find an installed version of Gradle either in Android Studio,
or on your system to install the gradle wrapper. Please include gradle
in your path, or install Android Studio
必须提取 Gradle(完整版本),并且必须将 bin 文件夹添加到用户 PATH 变量中。添加到 PATH 后,启动新的 PowerShell 或命令提示符窗口并运行命令。
¥Gradle (the complete version) must be extracted and the
bin folder must be added to the user PATH variable. After adding to PATH,
launch a new PowerShell or Command Prompt window and run the command.
要测试阅读是否有效:
¥To test that reading works:
-
下载 https://xlsx.nodejs.cn/pres.numbers
¥Download https://xlsx.nodejs.cn/pres.numbers
-
在 Finder 或 Explorer 中打开“下载”文件夹
¥Open the Downloads folder in Finder or Explorer
-
点击
pres.numbers并将其从窗口中拖到模拟器中。¥Click and drag
pres.numbersfrom the window into the simulator. -
点击 "加载文件",点击
≡图标,点击 "下载",然后选择pres.numbers。¥Tap "Load File", tap the
≡icon, tap "Downloads" and selectpres.numbers.
要测试写作是否有效:
¥To test that writing works:
-
点击 "保存存档"。你将看到一个带有位置的弹出窗口。
¥Tap "Save File". You will see a popup with a location.
-
从模拟器中提取文件并验证内容:
¥Pull the file from the simulator and verify the contents:
adb exec-out run-as org.sheetjs.quasar cat files/files/SheetJSQuasar.xlsx > /tmp/SheetJSQuasar.xlsx
npx xlsx-cli /tmp/SheetJSQuasar.xlsx
PowerShell 文件重定向将损坏二进制数据。在 Windows 中,必须从命令提示符会话中运行命令。
¥PowerShell file redirects will corrupt binary data. In Windows, commands must be run from a Command Prompt session.
iOS
-
创建 iOS 项目:
¥Create the iOS project:
cd src-cordova
npx cordova platform add ios
npx cordova plugin add cordova-plugin-wkwebview-engine
npx cordova plugin add cordova-plugin-file
cd ..
如果出现错误 Could not load API for iOS project,则需要重置:
¥If there is an error Could not load API for iOS project, it needs to be reset:
npx cordova platform rm ios
npx cordova platform add ios
npx cordova plugin add cordova-plugin-file
-
启用文件共享并使文档文件夹在 iOS 应用中可见。必须将以下行添加到
src-cordova/platforms/ios/SheetJSQuasar/SheetJSQuasar-Info.plist:¥Enable file sharing and make the documents folder visible in the iOS app. The following lines must be added to
src-cordova/platforms/ios/SheetJSQuasar/SheetJSQuasar-Info.plist:
<plist version="1.0">
<dict>
  <key>UIFileSharingEnabled</key>
  <true/>
  <key>LSSupportsOpeningDocumentsInPlace</key>
  <true/>
  <key>CFBundleDevelopmentRegion</key>
(文档的根元素是 plist,它包含一个 dict 子元素)
¥(The root element of the document is plist and it contains one dict child)
-
启动开发服务器:
¥Start the development server:
npx quasar dev -m cordova -T ios
如果提示选择外部 IP,请按 Enter。
¥If prompted to select an external IP, press Enter.
如果应用为空白或不刷新,请删除该应用并关闭模拟器,然后重新启动开发过程。
¥If the app is blank or not refreshing, delete the app and close the simulator, then restart the development process.
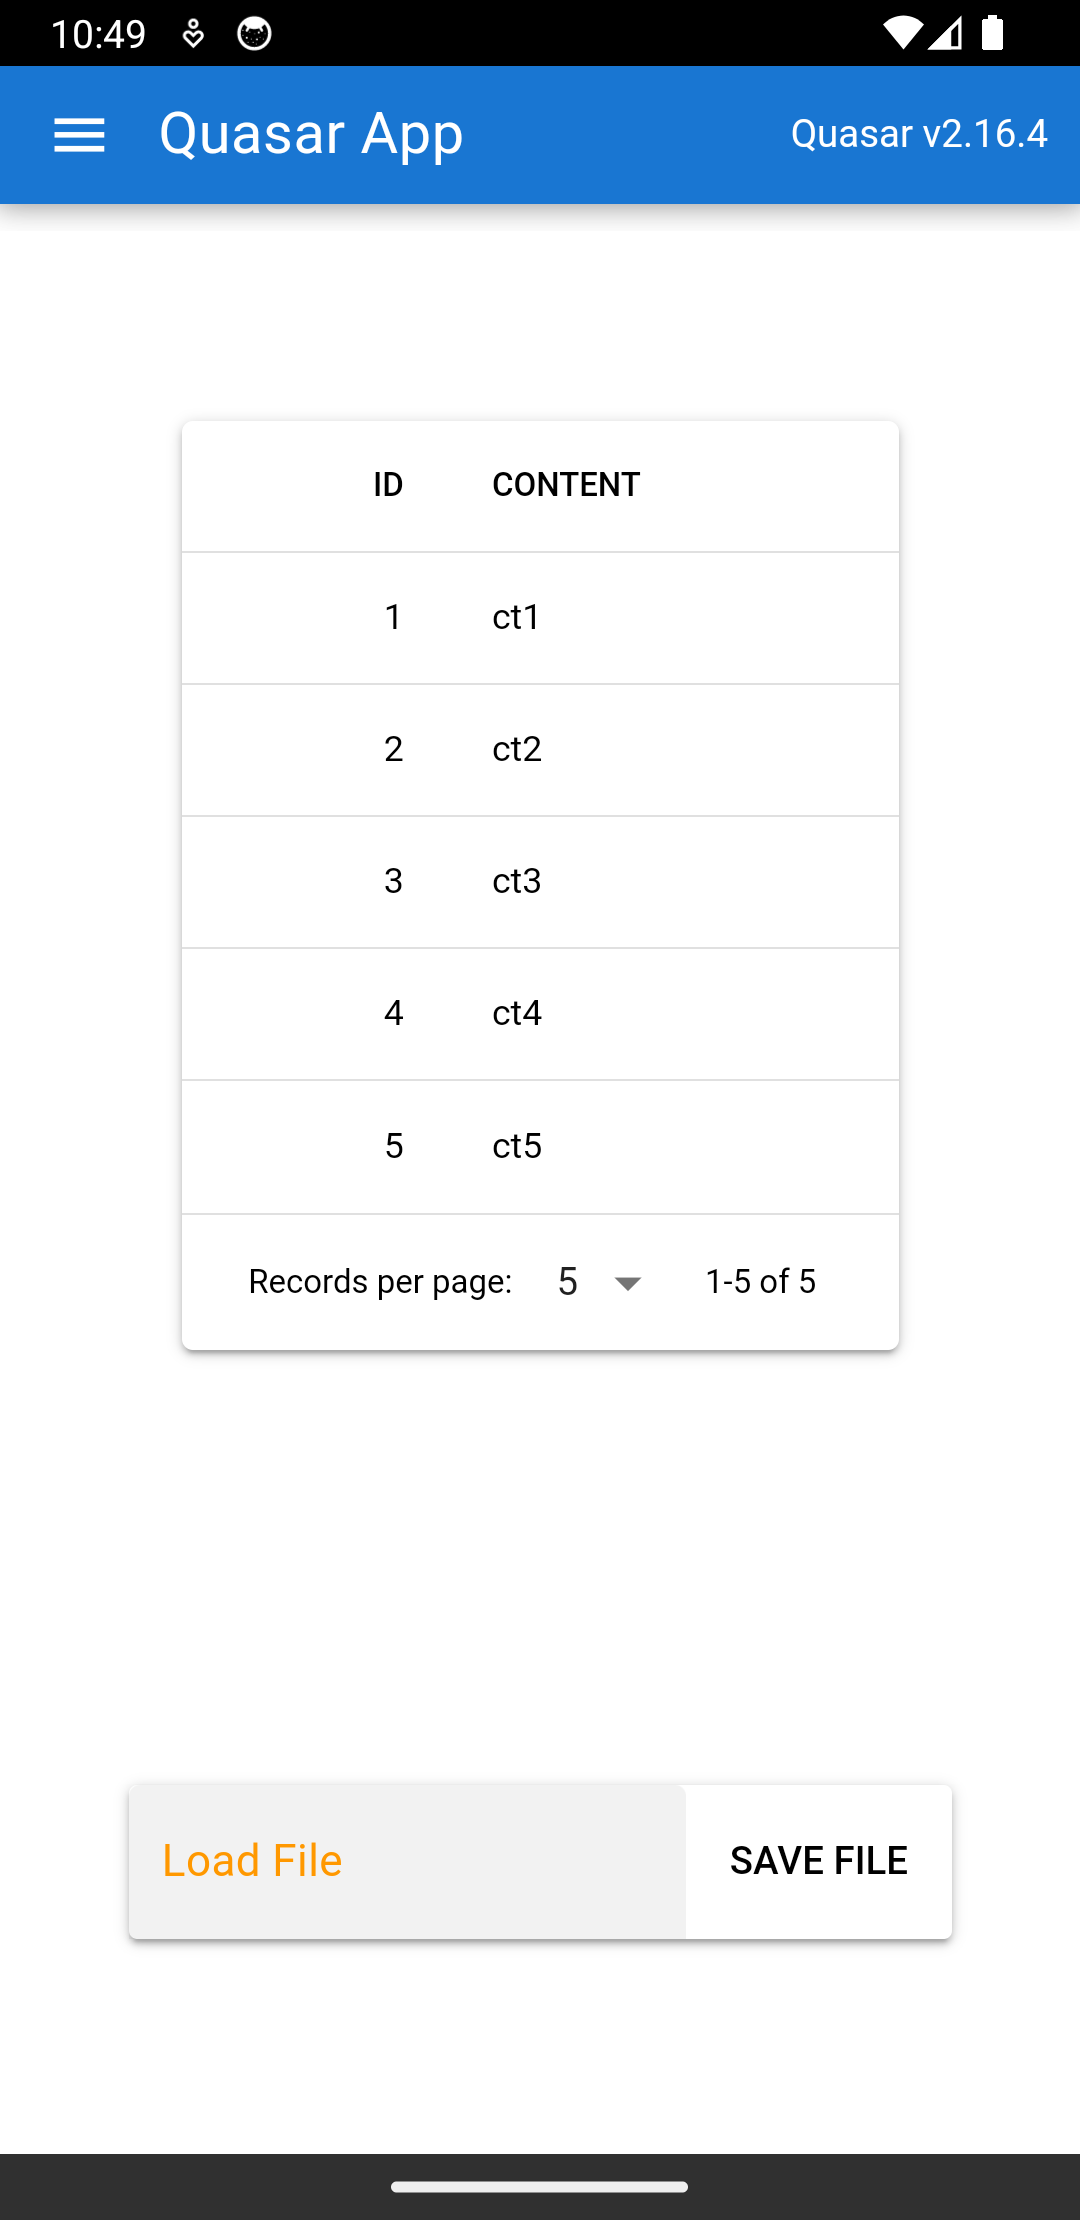
该应用现在应在底部显示两个按钮:
¥The app should now show two buttons at the bottom:

如果应用为空白或不刷新,请删除该应用并关闭模拟器,然后重新启动开发过程。
¥If the app is blank or not refreshing, delete the app and close the simulator, then restart the development process.
要测试阅读是否有效:
¥To test that reading works:
-
下载 https://xlsx.nodejs.cn/pres.numbers
¥Download https://xlsx.nodejs.cn/pres.numbers
-
在模拟器中,单击“主页”图标返回主屏幕
¥In the simulator, click the Home icon to return to the home screen
-
单击 "文件" 图标
¥Click on the "Files" icon
-
单击
pres.numbers并将其从 Finder 窗口拖动到模拟器中。¥Click and drag
pres.numbersfrom a Finder window into the simulator.

-
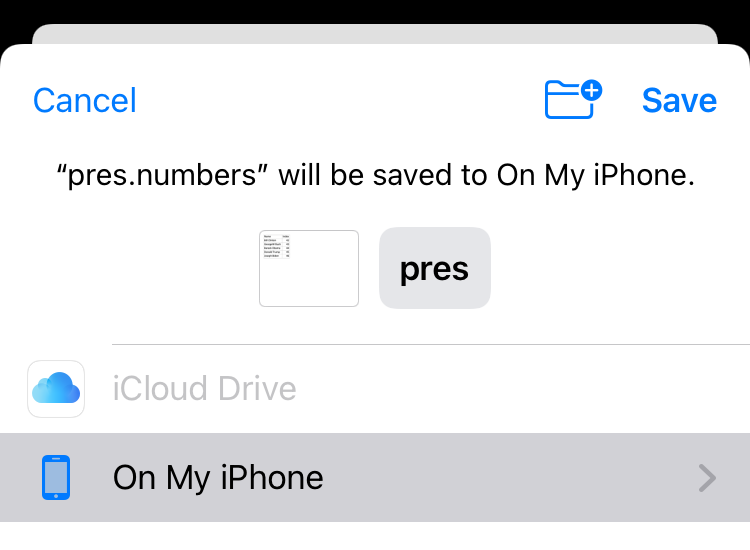
确保高亮 "在我的 iPhone 上" 并选择 "保存"
¥Make sure "On My iPhone" is highlighted and select "Save"
-
再次单击主页图标,然后选择
SheetJSQuasar应用¥Click the Home icon again then select the
SheetJSQuasarapp -
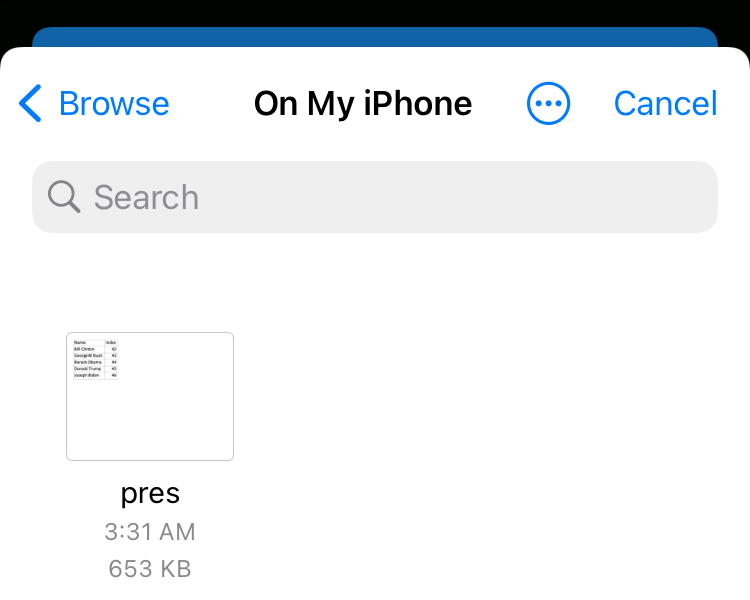
单击 "加载" 按钮,然后选择 "选择文件",然后选择
pres:¥Click the "Load" button, then select "Choose File" and select
pres:

选择后,屏幕应刷新并显示新内容。
¥Once selected, the screen should refresh with new contents.
要测试写作是否有效:
¥To test that writing works:
-
关闭模拟器中的应用,然后重新启动应用。
¥Close the app in the simulator and re-launch the app.
-
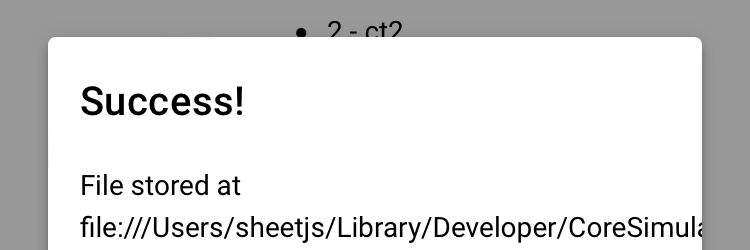
单击 "保存存档"。你将看到一个带有位置的弹出窗口:
¥Click "Save File". You will see a popup with a location:

-
找到该文件并验证内容是否正确。在新终端中运行:
¥Find the file and verify the contents are correct. Run in a new terminal:
find ~/Library/Developer/CoreSimulator -name SheetJSQuasar.xlsx |
  while read x; do echo "$x"; npx xlsx-cli "$x"; done
由于内容已恢复,你应该看到
¥Since the contents reverted, you should see
SheetJSQuasar
id,content
1,ct1
2,ct2
3,ct3
4,ct4
5,ct5
-
使用 "加载文件" 再次选择
pres.numbers。等待应用刷新。¥Use "Load File" to select
pres.numbersagain. Wait for the app to refresh. -
单击 "保存存档",然后重新运行命令:
¥Click "Save File", then re-run the command:
find ~/Library/Developer/CoreSimulator -name SheetJSQuasar.xlsx |
  while read x; do echo "$x"; npx xlsx-cli "$x"; done
pres.numbers 的内容现在应该显示,并带有一个新的标题行:
¥The contents from pres.numbers should show up now, with a new header row:
SheetJSQuasar
id,content
42,Bill Clinton
43,GeorgeW Bush
44,Barack Obama
45,Donald Trump
46,Joseph Biden
安卓设备
¥Android Device
-
关闭所有打开的模拟器和模拟器。
¥Close all open emulators and simulators.
-
断开连接到计算机的所有 iOS 或 Android 设备的连接。
¥Disconnect any iOS or Android devices connected to the computer.
-
将 Android 设备连接到计算机。
¥Connect the Android device to the computer.
-
启动开发过程:
¥Start the dev process:
npx quasar dev -m cordova -T android
如果提示选择外部 IP,请按 Enter。
¥If prompted to select an external IP, press Enter.
-
测试应用:
¥Test the application:
-
按下 Home 按钮(或用一根手指向上滑动)并切换到浏览器。
¥Press the Home button (or swipe up with one finger) and switch to Browser.
-
下载 https://xlsx.nodejs.cn/pres.numbers
¥Download https://xlsx.nodejs.cn/pres.numbers
-
按下 Home 按钮(或用一根手指向上滑动)并选择
SheetJSQuasar应用¥Press the Home button (or swipe up with one finger) and select the
SheetJSQuasarapp -
点击 "加载" 按钮,然后选择 "选择文件" 并选择下载的
pres.numbers¥Tap the "Load" button, then select "Choose File" and select the downloaded
pres.numbers
表格将使用新数据进行更新。
¥The table will update with new data.
"保存存档" 进程将写入文件。但是,Android 30+ 需要 Quasar 中未实现的特殊方法 ("存储访问框架")。
¥The "Save File" process will write files. However, Android 30+ requires special methods ("Storage Access Framework") that are not implemented in Quasar.
iOS 设备
¥iOS Device
-
关闭所有打开的模拟器和模拟器。
¥Close all open emulators and simulators.
-
断开连接到计算机的所有 iOS 或 Android 设备的连接。
¥Disconnect any iOS or Android devices connected to the computer.
-
将 iOS 设备连接到计算机。
¥Connect the iOS device to the computer.
-
打开 Xcode 项目:
¥Open the Xcode project:
open src-cordova/platforms/ios/SheetJSQuasar.xcodeproj
在导航器中选择 "SheetJSQuasar"。在主窗格中,选择 "签名和能力" 并确保选择了团队。保存并关闭项目。
¥Select "SheetJSQuasar" in the Navigator. In the main pane, select "Signing & Capabilities" and ensure a Team is selected. Save and close the project.
-
启动开发过程:
¥Start the dev process:
npx quasar dev -m cordova -T ios
如果提示选择外部 IP,请按 Enter。
¥If prompted to select an external IP, press Enter.
-
测试应用:
¥Test the application:
-
按下 Home 按钮(或用一根手指向上滑动)并切换到 Safari。
¥Press the Home button (or swipe up with one finger) and switch to Safari.
-
下载 https://xlsx.nodejs.cn/pres.numbers
¥Download https://xlsx.nodejs.cn/pres.numbers
-
按下 Home 按钮(或用一根手指向上滑动)并选择
SheetJSQuasar应用¥Press the Home button (or swipe up with one finger) and select the
SheetJSQuasarapp -
点击 "加载" 按钮,然后选择 "选择文件" 并选择下载的
pres.numbers¥Tap the "Load" button, then select "Choose File" and select the downloaded
pres.numbers
表格将使用新数据进行更新。
¥The table will update with new data.
-
点击 "保存存档"
¥Tap "Save File"
-
按下 Home 按钮(或用一根手指向上滑动)并切换到文件。
¥Press the Home button (or swipe up with one finger) and switch to Files.
-
点击
<直到显示主 "浏览" 窗口,然后选择 "在我的 iPhone 上"¥Tap
<until the main "Browse" window is displayed, then select "On My iPhone" -
查找 "SheetJSQuasar" 文件夹并点击
SheetJSQuasar.xlsx。¥Look for the "SheetJSQuasar" folder and tap
SheetJSQuasar.xlsx.
如果设备上安装了 Numbers,它将显示新文件的内容。
¥If Numbers is installed on the device, it will display the contents of the new file.
[^1]: 请�参阅 Quasar 文档中的 "文件选择器"。
¥See "File Picker" in the Quasar documentation.
[^2]: 见 read 于 "读取文件"
[^3]: 有关工作簿、工作表和其他概念的更多详细信息,请参阅 "SheetJS 数据模型"。
¥See "SheetJS Data Model" for more details on workbooks, worksheets, and other concepts.
[^4]: 见 sheet_to_json 于 "实用工具"
¥See sheet_to_json in "Utilities"
[^5]: 见 json_to_sheet 于 "实用工具"
¥See json_to_sheet in "Utilities"
[^6]: 有关 book_new 和 book_append_sheet 的详细信息,请参阅 "工作簿助手" 于 "实用工具"。
¥See "Workbook Helpers" in "Utilities" for details on book_new and book_append_sheet.
[^7]: 见 write 于 "写入文件"
[^8]: 有关更多详细信息,请参阅 MDN Web 文档中的 requestFileSystem。
¥See requestFileSystem in the MDN Web Docs for more details.

