Tauri 应用中的数据整理
Tauri 是一个用于构建桌面应用的现代工具包。Tauri 应用利用平台原生浏览器引擎来构建轻量级程序。
¥Tauri is a modern toolkit for building desktop apps. Tauri apps leverage platform-native browser engines to build lightweight programs.
SheetJS 是一个用于从电子表格读取和写入数据的 JavaScript 库。
¥SheetJS is a JavaScript library for reading and writing data from spreadsheets.
该演示使用 Tauri 和 SheetJS 从电子表格中提取数据并在应用中显示数据。我们将探索如何在 Tauri 应用中加载 SheetJS 并在 JavaScript 前端和 Rust 后端之间交换文件数据。
¥This demo uses Tauri and SheetJS to pull data from a spreadsheet and display the data in the app. We'll explore how to load SheetJS in a Tauri app and exchange file data between the JavaScript frontend and Rust backend.
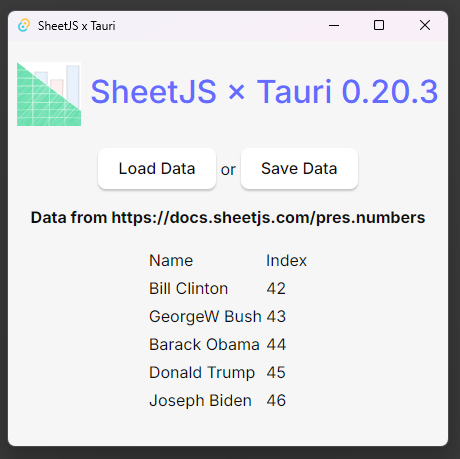
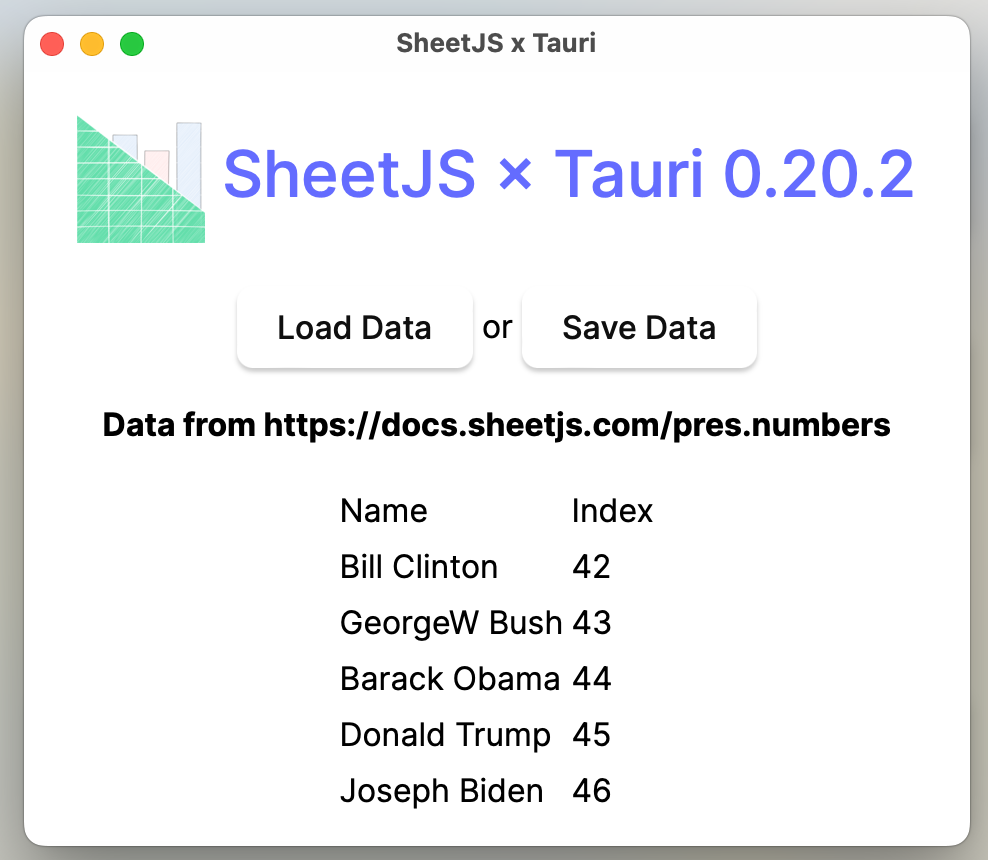
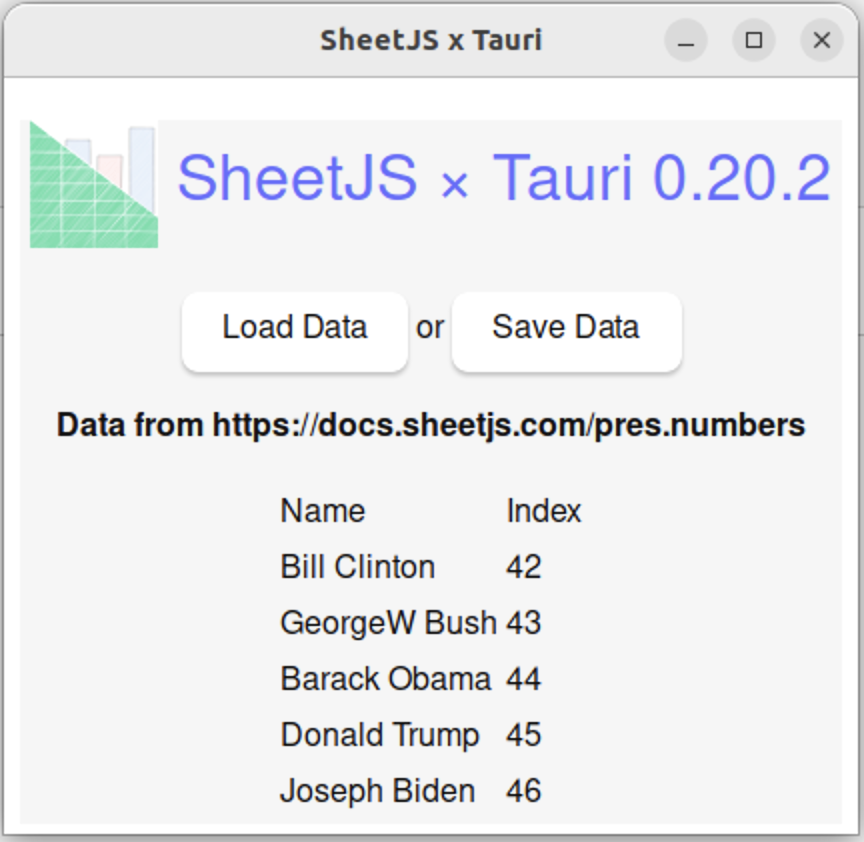
"完整示例" 部分涵��盖了用于读取和写入工作簿的完整桌面应用。该应用将如下图所示:
¥The "Complete Example" section covers a complete desktop app to read and write workbooks. The app will look like the screenshots below:
| Windows | macOS | Linux |
|---|---|---|
|
|
|
本 demo 在以下环境下进行了测试:
¥This demo was tested in the following environments:
| 操作系统和版本 | 架构 | Tauri | 日期 |
|---|---|---|---|
| macOS 15.3.2 | darwin-x64 | v1.6.0 | 2025-03-31 |
| macOS 14.5 | darwin-arm | v1.6.0 | 2025-03-30 |
| 视窗 11 | win11-x64 | v1.6.0 | 2025-05-27 |
| 视窗 11 | win11-arm | v1.6.0 | 2025-02-23 |
| Linux(全息操作系统) | linux-x64 | v1.6.0 | 2025-01-02 |
| Linux(Debian) | linux-arm | v1.6.0 | 2025-05-27 |
集成详情
¥Integration Details
SheetJS NodeJS 模块 可以从 JavaScript 代码安装和导入。
¥The SheetJS NodeJS Module can be installed and imported from JavaScript code.
以下解释适用于 Tauri 1。
¥The following explanation applies to Tauri 1.
Tauri 2 中放弃了 allowlist 安全模型。
¥The allowlist security model was abandoned in Tauri 2.
Tauri 1.x 不提供与 NodeJS fs 模块等效的功能。示例中使用的原始 @tauri-apps/api 方法预计不会改变。
¥Tauri 1.x does not provide the equivalent of NodeJS fs module. The raw
@tauri-apps/api methods used in the examples are not expected to change.
出于安全原因,Tauri 应用必须明确启用系统功能。[^1] 它们在配置文件的 tauri 部分的 allowlist 子部分中的 src-tauri/tauri.conf.json 中启用。
¥For security reasons, Tauri apps must explicitly enable system features.[^1]
They are enabled in src-tauri/tauri.conf.json in the allowlist subsection of
the tauri section of the configuration file.
-
fs权利 [^2] 允许读取和写入文件数据。¥The
fsentitlement[^2] enables reading and writing file data.
  "tauri": {
    "allowlist": {
      "fs": {
        "all": true
      }
-
dialog权利 [^3] 启用打开和保存对话框方法。¥The
dialogentitlement[^3] enables the open and save dialog methods.
  "tauri": {
    "allowlist": {
      "dialog": {
        "all": true
      }
-
http权利 [^4] 允许下载文件。请注意,在本地文件系统中读取或写入文件不需要http。¥The
httpentitlement[^4] enables downloading files. Note thathttpis not needed for reading or writing files in the local filesystem.
  "tauri": {
    "allowlist": {
      "http": {
        "all": true,
        "request": true,
        "scope": ["https://**"]
      }
读取文件
¥Reading Files
读取文件分为三个步骤:
¥There are three steps to reading files:
-
显示打开文件对话框以允许用户选择路径。
@tauri-apps/api/dialog[^5] 中的open方法简化了这个过程。¥Show an open file dialog to allow users to select a path. The
openmethod in@tauri-apps/api/dialog[^5] simplifies this process. -
使用
@tauri-apps/api/fs[^6] 中的readBinaryFile方法从所选文件中读取原始数据。此方法解析为标准Uint8Array¥Read raw data from the selected file using the
readBinaryFilemethod in@tauri-apps/api/fs[^6]. This method resolves to a standardUint8Array -
使用 SheetJS
read方法 [^7] 解析数据。此方法返回一个 SheetJS 工作簿对象。¥Parse the data with the SheetJS
readmethod[^7]. This method returns a SheetJS workbook object.
以下代码示例定义了一个函数 openFile,该函数执行所有三个步骤并返回 SheetJS 工作簿对象:
¥The following code example defines a single function openFile that performs
all three steps and returns a SheetJS workbook object:
import { read } from 'xlsx';
import { open } from '@tauri-apps/api/dialog';
import { readBinaryFile } from '@tauri-apps/api/fs';

const filters = [
  {name: "Excel Binary Workbook", extensions: ["xlsb"]},
  {name: "Excel Workbook", extensions: ["xlsx"]},
  {name: "Excel 97-2004 Workbook", extensions: ["xls"]},
  // ... other desired formats ...
];

async function openFile() {
  /* show open file dialog */
  const selected = await open({
    title: "Open Spreadsheet",
    multiple: false,
    directory: false,
    filters
  });

  /* read data into a Uint8Array */
  const d = await readBinaryFile(selected);

  /* parse with SheetJS */
  const wb = read(d);
  return wb;
}
此时,标准 SheetJS 实用函数 [^8] 可以从工作簿对象中提取数据。该演示包括一个调用 sheet_to_json[^9] 的按钮来生成数据数组的数组。
¥At this point, standard SheetJS utility functions[^8] can extract data from the
workbook object. The demo includes a button that calls sheet_to_json[^9] to
generate an array of arrays of data.
- VueJS
- Kaioken
以下代码片段使用 VueJS 框架:
¥The following snippet uses the VueJS framework:
import { utils } from 'xlsx';
import { shallowRef } from 'vue';
const data = shallowRef([[]]); // update data by setting `data.value`

const open_button_callback = async() => {
  const wb = await openFile();

  /* get the first worksheet */
  const ws = wb.Sheets[wb.SheetNames[0]];

  /* get data from the first worksheet */
  const array = utils.sheet_to_json(ws, { header: 1 });
  data.value = array;
};
以下代码片段显示了一个简单的 Kaioponent:
¥The following snippet shows a simple Kaioponent:
import { utils } from 'xlsx';
import { useState } from 'kaioken';

function SheetJSImportKaioponent() {
  const [data, setData] = useState<any[][]>([]);

  const open_callback = async() => {
    const wb = await openFile();

    /* get the first worksheet */
    const ws = wb.Sheets[wb.SheetNames[0]];

    /* get data from the first worksheet */
    const array = utils.sheet_to_json(ws, { header: 1 });
    setData(array);
  };

  return ( <>
    <button type="button" onclick={open_callback}>Load Data</button>
    <table><tbody>{data.map((row) =>
      <tr>{row.map((cell) => <td>{cell}</td>)}</tr>
    )}</tbody></table>
  </> );
}
写入文件
¥Writing Files
写入�文件分为三个步骤:
¥There are three steps to writing files:
-
显示保存文件对话框以允许用户选择路径。
@tauri-apps/api/dialog[^10] 中的save方法简化了这个过程。¥Show a save file dialog to allow users to select a path. The
savemethod in@tauri-apps/api/dialog[^10] simplifies this process. -
使用 SheetJS
write方法 [^11] 写入数据。可以从选定的文件路径推断输出的书籍类型。使用buffer输出类型 [^12],该方法将返回一个与 Tauri 配合良好的Uint8Array对象。¥Write the data with the SheetJS
writemethod[^11]. The output book type can be inferred from the selected file path. Using thebufferoutput type[^12], the method will return aUint8Arrayobject that plays nice with Tauri. -
使用
writeBinaryFile将数据写入@tauri-apps/api/fs[^13] 中。¥Write the data using
writeBinaryFilein@tauri-apps/api/fs[^13].
以下代码示例定义了一个函数 saveFile,该函数从 SheetJS 工作簿对象开始执行所有三个步骤:
¥The following code example defines a single function saveFile that performs
all three steps starting from a SheetJS workbook object:
import { write } from 'xlsx';
import { save } from '@tauri-apps/api/dialog';
import { writeBinaryFile } from '@tauri-apps/api/fs';

const filters = [
  {name: "Excel Binary Workbook", extensions: ["xlsb"]},
  {name: "Excel Workbook", extensions: ["xlsx"]},
  {name: "Excel 97-2004 Workbook", extensions: ["xls"]},
  // ... other desired formats ...
];

async function saveFile(wb) {
  /* show save file dialog */
  const selected = await save({
    title: "Save to Spreadsheet",
    filters
  });
  if(!selected) return;

  /* Generate workbook */
  const bookType = selected.slice(selected.lastIndexOf(".") + 1);
  const d = write(wb, {type: "buffer", bookType});

  /* save data to file */
  await writeBinaryFile(selected, d);
}
该演示包括一个按钮,该按钮调用 aoa_to_sheet[^14] 从数据数组生成一个工作表。使用 book_new 和 book_append_sheet[^15] 构建工作簿。
¥The demo includes a button that calls aoa_to_sheet[^14] to generate a sheet
from array of arrays of data. A workbook is constructed using book_new and
book_append_sheet[^15].
- VueJS
- Kaioken
以下代码片段�使用 VueJS 框架:
¥The following snippet uses the VueJS framework:
import { utils } from 'xlsx';
import { shallowRef } from 'vue';
const data = shallowRef([[]]); // `data.value` is an array of arrays

const save_button_callback = async() => {
  /* generate worksheet from the data */
  const ws = utils.aoa_to_sheet(data.value);

  /* create a new workbook object */
  const wb = utils.book_new();

  /* append the worksheet to the workbook using the sheet name "SheetJSTauri" */
  utils.book_append_sheet(wb, ws, "SheetJSTauri");

  await saveFile(wb);
}
以下代码片段显示了一个简单的 Kaioponent:
¥The following snippet shows a simple Kaioponent:
import { utils } from 'xlsx';
import { useState } from 'kaioken';

function SheetJSExportKaioponent() {
  const [data, setData] = useState<any[][]>(["SheetJS".split(""), "Kaioken".split("")]);

  const save_callback = async() => {
    /* generate worksheet from the data */
    const ws = utils.aoa_to_sheet(data);

    /* create a new workbook object */
    const wb = utils.book_new();

    /* append the worksheet to the workbook using the sheet name "SheetJSTauri" */
    utils.book_append_sheet(wb, ws, "SheetJSTauri");

    await saveFile(wb);
  }

  return ( <button type="button" onclick={save_callback}>Save Data</button> );
}
完整示例
¥Complete Example
-
阅读 Tauri "入门" 指南并安装先决条件.[^16]
¥Read Tauri "Getting Started" guide and install prerequisites.[^16]
Installation Notes (click to show)
At a high level, the following software is required for building Tauri apps:
- a native platform-specific C/C++ compiler (for example, macOS requires Xcode)
- a browser engine integration (for example, Linux requires
webkit2gtk) - Rust
The platform configuration can be verified by running:
npx @tauri-apps/cli info
If required dependencies are installed, the output will show a checkmark next to "Environment". The output from the most recent macOS test is shown below:
[✔] Environment
    - OS: Mac OS 14.5.0 arm64 (X64)
    ✔ Xcode Command Line Tools: installed
    ✔ rustc: 1.87.0 (17067e9ac 2025-05-09)
    ✔ cargo: 1.87.0 (99624be96 2025-05-06)
    ✔ rustup: 1.28.2 (e4f3ad6f8 2025-04-28)
    ✔ Rust toolchain: stable-aarch64-apple-darwin (default)
    - node: 20.18.0
    - pnpm: 9.12.3
    - npm: 10.8.2
    - bun: 1.2.14
    - deno: deno 2.3.3
When the demo was last tested on ARM64 macOS, the output mentioned X64. The
build step will correctly detect the platform architecture.
-
创建一个新的 Tauri 应用:
¥Create a new Tauri app:
- VueJS
- Kaioken
npm create tauri-app@3.x -- -m npm -t vue-ts SheetJSTauri -y
没有官方的 Tauri Kaioken 模板。该演示从普通 TypeScript 模板开始并手动连接 Kaioken
¥There is no official Tauri Kaioken template. This demo starts from the vanilla TypeScript template and manually wires Kaioken
npm create tauri-app@3.x -- -m npm -t vanilla-ts SheetJSTauri -y
-
进入目录并安装依赖:
¥Enter the directory and install dependencies:
cd SheetJSTauri
npm i --save https://cdn.sheetjs.com/xlsx-0.20.3/xlsx-0.20.3.tgz
npm i --save @tauri-apps/api
npm i --save-dev @tauri-apps/cli
- VueJS
- Kaioken
安装 Kaioken 依赖:
¥Install the Kaioken dependencies:
npm add kaioken --save
npm add vite-plugin-kaioken -D --save
-
将高亮的行添加到
tauri.allowlist部分中的src-tauri/tauri.conf.json:¥Add the highlighted lines to
src-tauri/tauri.conf.jsonin thetauri.allowlistsection:
  "tauri": {
    "allowlist": {
      "http": {
        "all": true,
        "request": true,
        "scope": ["https://**"]
      },
      "dialog": {
        "all": true
      },
      "fs": {
        "all": true
      },
在同一文件中,查找 "title" 并将值更改为 SheetJS x Tauri:
¥In the same file, look for "title" and change the value to SheetJS x Tauri:
    "windows": [
      {
        "title": "SheetJS x Tauri",
        "width": 800,
在同一文件中,查找 "identifier" 并将值更改为 com.sheetjs.tauri:
¥In the same file, look for "identifier" and change the value to com.sheetjs.tauri:
      "targets": "all",
      "identifier": "com.sheetjs.tauri",
      "icon": [
- VueJS
- Kaioken
-
下载
App.vue并用下载的脚本替换src/App.vue。¥Download
App.vueand replacesrc/App.vuewith the downloaded script.
curl -o src/App.vue https://xlsx.nodejs.cn/tauri/App.vue
-
将 Kaioken 连接到 Tauri 应用:
¥Wire up Kaioken to the Tauri app:
-
将高亮的行添加到
vite.config.ts:¥Add the highlighted lines to
vite.config.ts:
import { defineConfig } from "vite";
import kaioken from "vite-plugin-kaioken";

// https://vitejs.dev/config/
export default defineConfig(async () => ({
  plugins: [kaioken()],
-
编辑
tsconfig.json。在compilerOptions中添加选项"jsx": "preserve":¥Edit
tsconfig.json. IncompilerOptionsadd the option"jsx": "preserve":
{
  "compilerOptions": {
    "jsx": "preserve",
-
将
index.html替换为以下代码块:¥Replace
index.htmlwith the following codeblock:
<!doctype html>
<html lang="en">
  <head>
    <meta charset="UTF-8" />
    <link rel="stylesheet" href="/src/styles.css" />
    <meta name="viewport" content="width=device-width, initial-scale=1.0" />
    <title>SheetJS x Tauri</title>
    <script type="module" src="/src/main.ts" defer></script>
  </head>

  <body>
    <div id="container" class="container"></div>
  </body>
</html>
-
将以下行添加到
src/styles.css:¥Add the following lines to
src/styles.css:
.logo {
  padding: 0px;
  height: 64px; width: 64px;
  vertical-align: middle;
}
.logo:hover {
  filter: drop-shadow(0 0 2em #646cffaa);
}
.centre { text-align: center; }
table.center {
  margin-left: auto;
  margin-right: auto;
}
-
将
src/main.ts替换为以下代码块:¥Replace
src/main.tswith the following codeblock:
import { mount } from "kaioken";
import App from "./App";

const root = document.getElementById("container");
mount(App, root!);
curl -o src/App.tsx https://xlsx.nodejs.cn/tauri/App.tsx
-
构建应用
¥Build the app with
npm run tauri build
最后,它将打印生成的安装程序的路径。
¥At the end, it will print the path to the generated installer.
如果构建失败,请参阅 "故障排除" 了解更多详细信息。
¥If the build fails, see "Troubleshooting" for more details.
-
运行程序。
¥Run the program.
- Linux/MacOS
- Windows
根据 Tauri 的版本,命令可能是
¥Depending on the version of Tauri, the command may be
./src-tauri/target/release/sheetjstauri
or
./src-tauri/target/release/sheet-js-tauri
or
./src-tauri/target/release/SheetJSTauri
.\src-tauri\target\release\SheetJSTauri.exe
应手动验证以下功能:
¥The following features should be manually verified:
-
加载后,应用将下载 https://xlsx.nodejs.cn/pres.numbers 并将数据显示在表格中。
¥When it is loaded, the app will download https://xlsx.nodejs.cn/pres.numbers and display the data in a table.
-
单击 "保存数据" 将显示保存对话框。如果没有文件名,请输入
SheetJSTauri.xlsb。单击 "保存"。应用将写入可在电子表格编辑器中打开的文件。¥Clicking "Save Data" will show a save dialog. If there is no filename, type
SheetJSTauri.xlsb. Click "Save". The app will write a file which can be opened in a spreadsheet editor. -
在电子表格编辑器中编辑文件,然后单击 "加载数据" 并选择编辑后的文件。该表将刷新为新内容。
¥Edit the file in a spreadsheet editor, then click "Load Data" and select the edited file. The table will refresh with new contents.
故障排除
¥Troubleshooting
在某些测试中,构建失败并显示错误消息:
¥In some tests, the build failed with the error message:
Search string not found: "/supportedTSExtensions = .*(?=;)/"
这是 vue-tsc 的一个已知问题。依赖必须升级:
¥This is a known issue with vue-tsc. The dependency must be upgraded:
npm install vue-tsc@latest
在上次 Linux ARM64 测试中,构建无法创建 AppImage:
¥During the last Linux ARM64 test, the build failed to create an AppImage:
Error [tauri-cli-node] failed to bundle project: error running appimage.sh
这是一个已知的 Tauri AppImage 打包错误。由于实际应用和 .deb 可分发文件已创建,因此可以忽略该错误。
¥This is a known Tauri AppImage packaging bug. Since the actual application and
the .deb distributable are created, the error can be ignored.
在上次 Linux x64 测试期间,构建失败并显示错误消息:
¥During the last Linux x64 test, the build failed with the error message:
'openssl/opensslv.h' file not found
必须安装 OpenSSL。在 Arch Linux 和 HoloOS (Steam Deck) 上:
¥OpenSSL must be installed. On Arch Linux and HoloOS (Steam Deck):
sudo pacman -S openssl
在某些 macOS 测试中,构建失败并显示以下错误消息:
¥In some macOS tests, the build failed with the following error message:
Error failed to bundle project: error running bundle_dmg.sh
可以通过运行发现错误的根本原因
¥The root cause of the error can be discovered by running
npm run tauri build -- --verbose
最近的测试失败并显示一条消息:
¥The most recent test failed with a message:
execution error: Not authorized to send Apple events to Finder
通过允许终端控制 Finder 解决了此错误。
¥This error was resolved by allowing Terminal to control Finder.
在 "系统设置" 应用中,在左栏中选择 "隐私与安全",然后在正文中选择 "自动化"。查找 "终端",展开该部分,然后启用 "发现者"。
¥In the "System Settings" app, select "Privacy & Security" in the left column and select "Automation" in the body. Look for "Terminal", expand the section, and enable "Finder".
在一些测试中,字体与屏幕截图不匹配。
¥In some tests, the fonts did not match the screenshots.
必须手动下载并安装 Inter 字体静态 TTF。[^17]
¥The Inter font static TTFs must be manually downloaded and installed.[^17]
[^1]: 请参阅 Tauri 文档中的 "安全"
¥See "Security" in the Tauri documentation
[^2]: 请参阅 Tauri 文档中的 FsAllowlistConfig
¥See FsAllowlistConfig in the Tauri documentation
[^3]: 请参阅 Tauri 文档中的 DialogAllowlistConfig
¥See DialogAllowlistConfig in the Tauri documentation
[^4]: 请参阅 Tauri 文档中的 HttpAllowlistConfig
¥See HttpAllowlistConfig in the Tauri documentation
[^5]: 请参阅 Tauri 文档中的 dialog
¥See dialog in the Tauri documentation
[^6]: 请参阅 Tauri 文档中的 fs
¥See fs in the Tauri documentation
[^7]: 见 read 于 "读取文件"
[^8]: 见 "实用函数"
¥See "Utility Functions"
[^9]: 见 "数组输出" 于 "实用函数"
¥See "Array Output" in "Utility Functions"
[^10]: 请参阅 Tauri 文档中的 dialog
¥See dialog in the Tauri documentation
[^11]: 见 write 于 "写入文件"
[^12]: 见 "支持的输出格式"
¥See "Supported Output Formats"
[^13]: 请参阅 Tauri 文档中的 fs
¥See fs in the Tauri documentation
[^14]: 见 "数组的数组输入" 于 "实用函数"
¥See "Array of Arrays Input" in "Utility Functions"
[^15]: 见 "工作簿助手" 于 "实用函数"
¥See "Workbook Helpers" in "Utility Functions"
[^16]: 请参阅 Tauri 文档中的 "先决条件"
¥See "Prerequisites" in the Tauri documentation
[^17]: 单击 Inter Google 字体列表 中的 "获取字体"
¥Click "Get font" in the Inter Google Fonts listing