带有 Electron 的电气化工作表
Electron 是一个用于构建桌面应用的现代工具包。Electron 应用使用与 Chromium 和 NodeJS 相同的技术。
¥Electron is a modern toolkit for building desktop apps. Electron apps use the same technologies powering Chromium and NodeJS.
SheetJS 是一个用于从电子表格读取和写入数据的 JavaScript 库。
¥SheetJS is a JavaScript library for reading and writing data from spreadsheets.
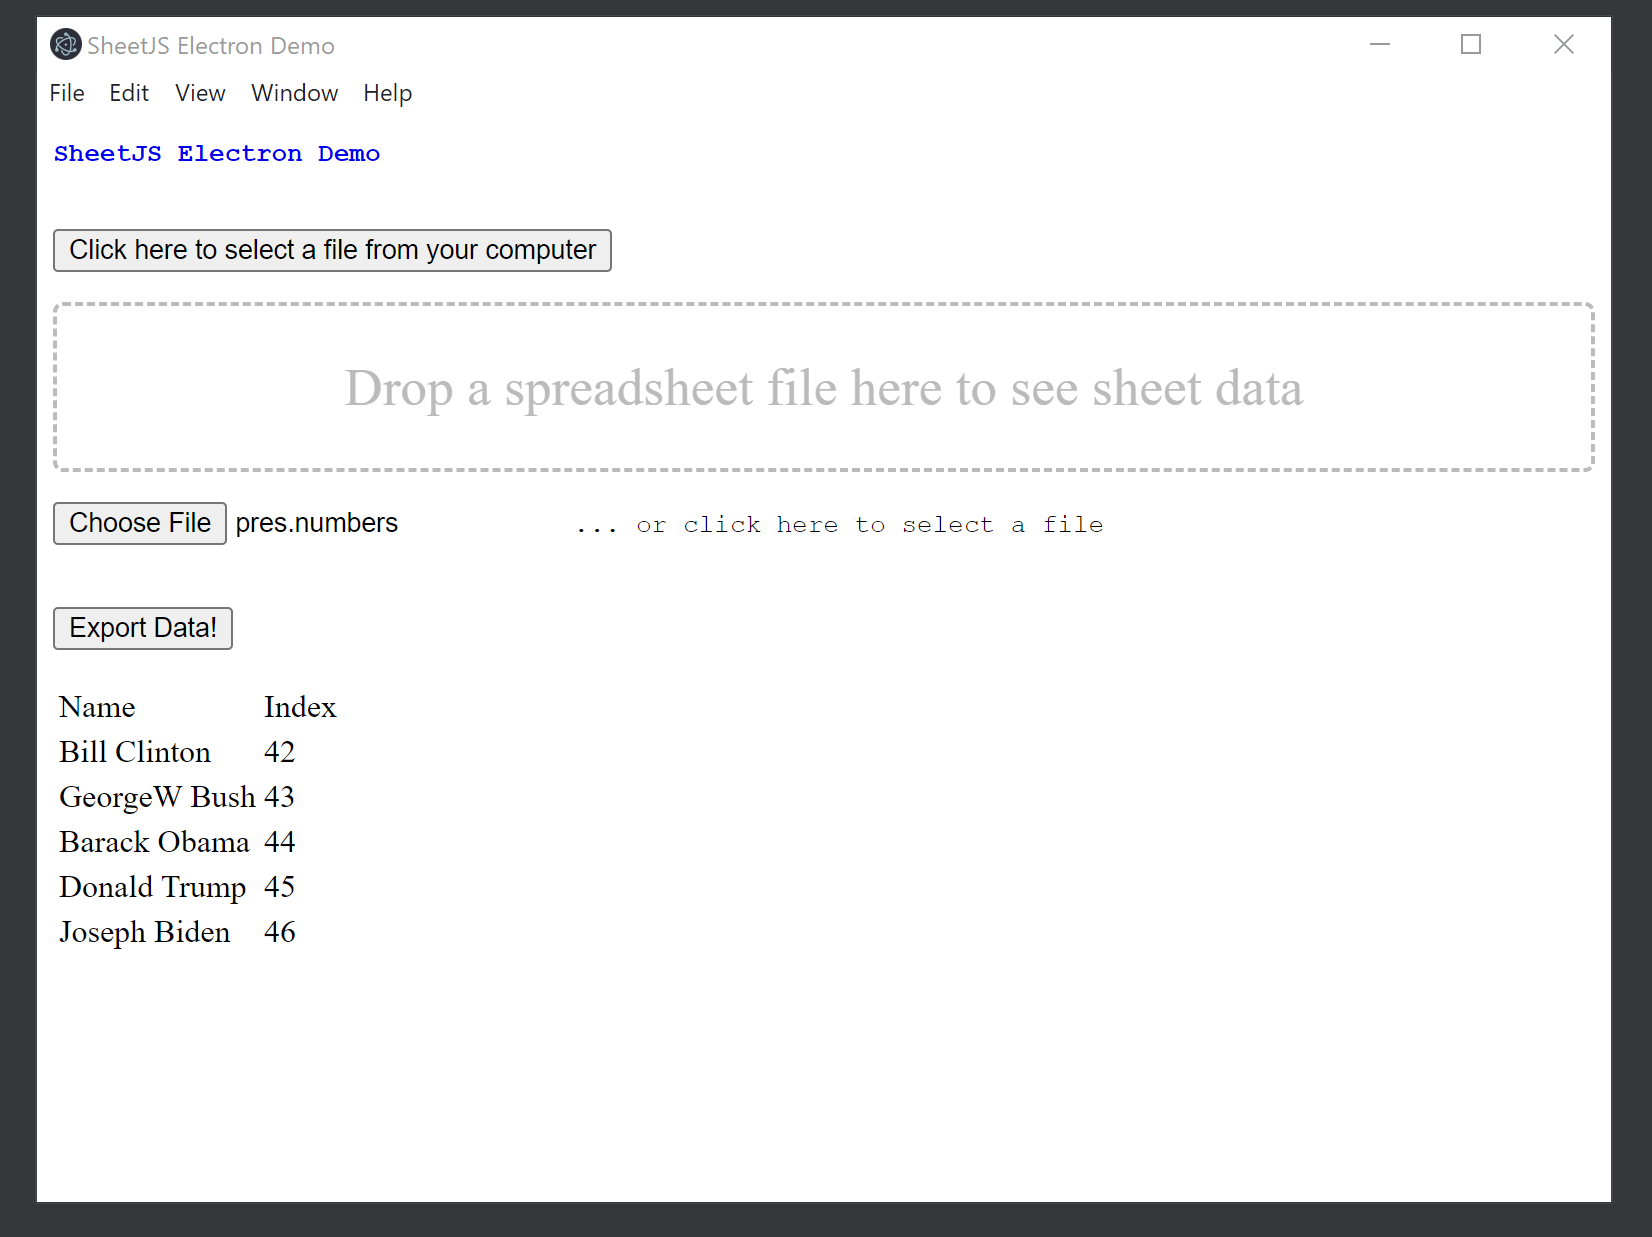
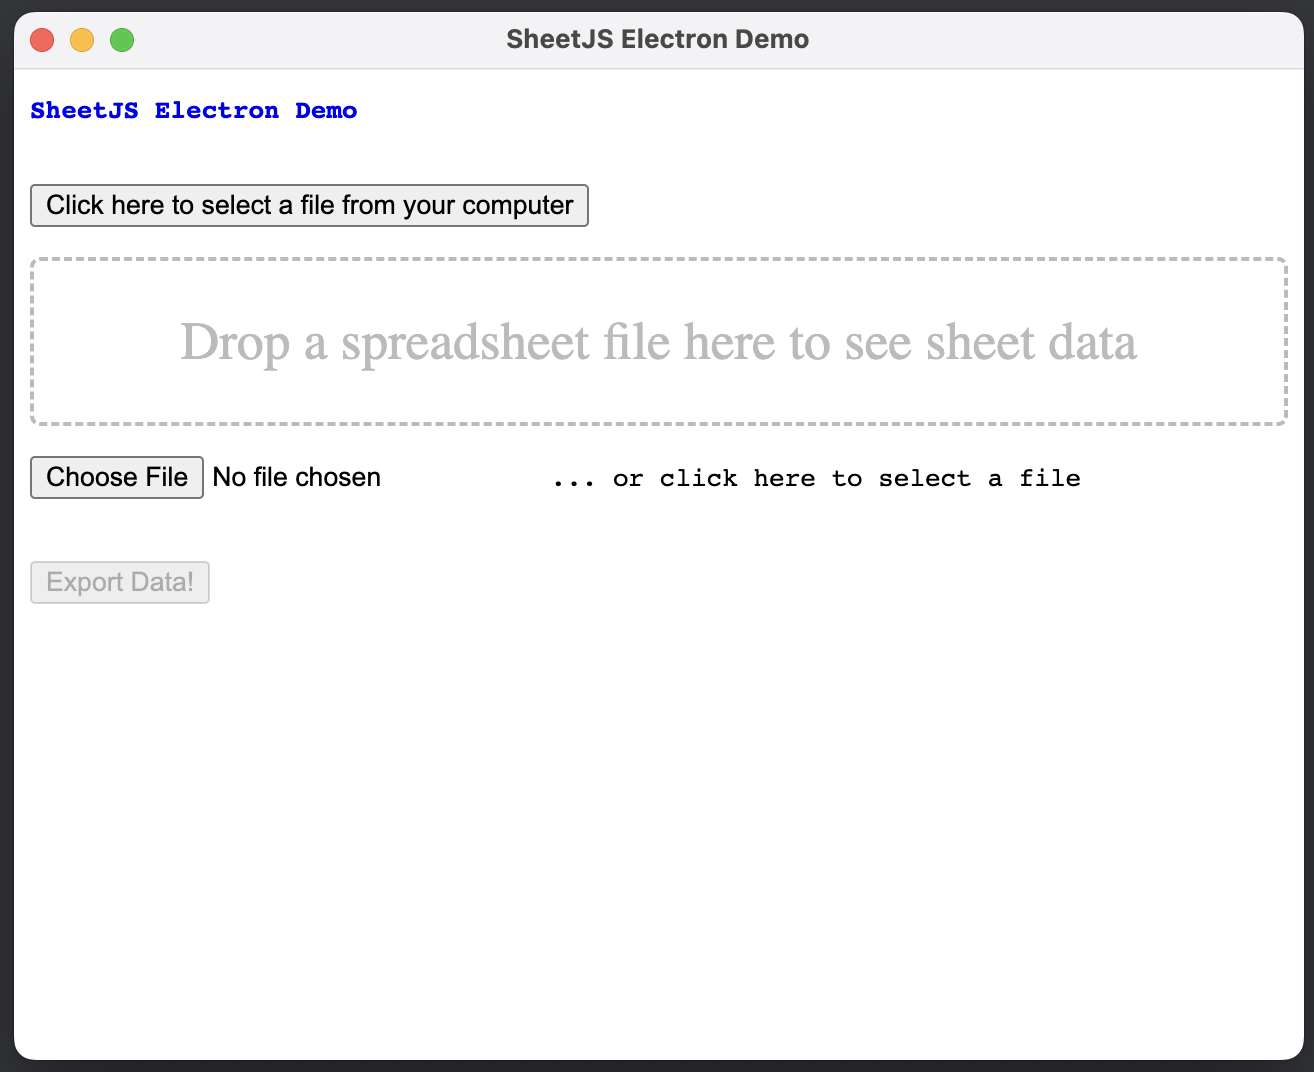
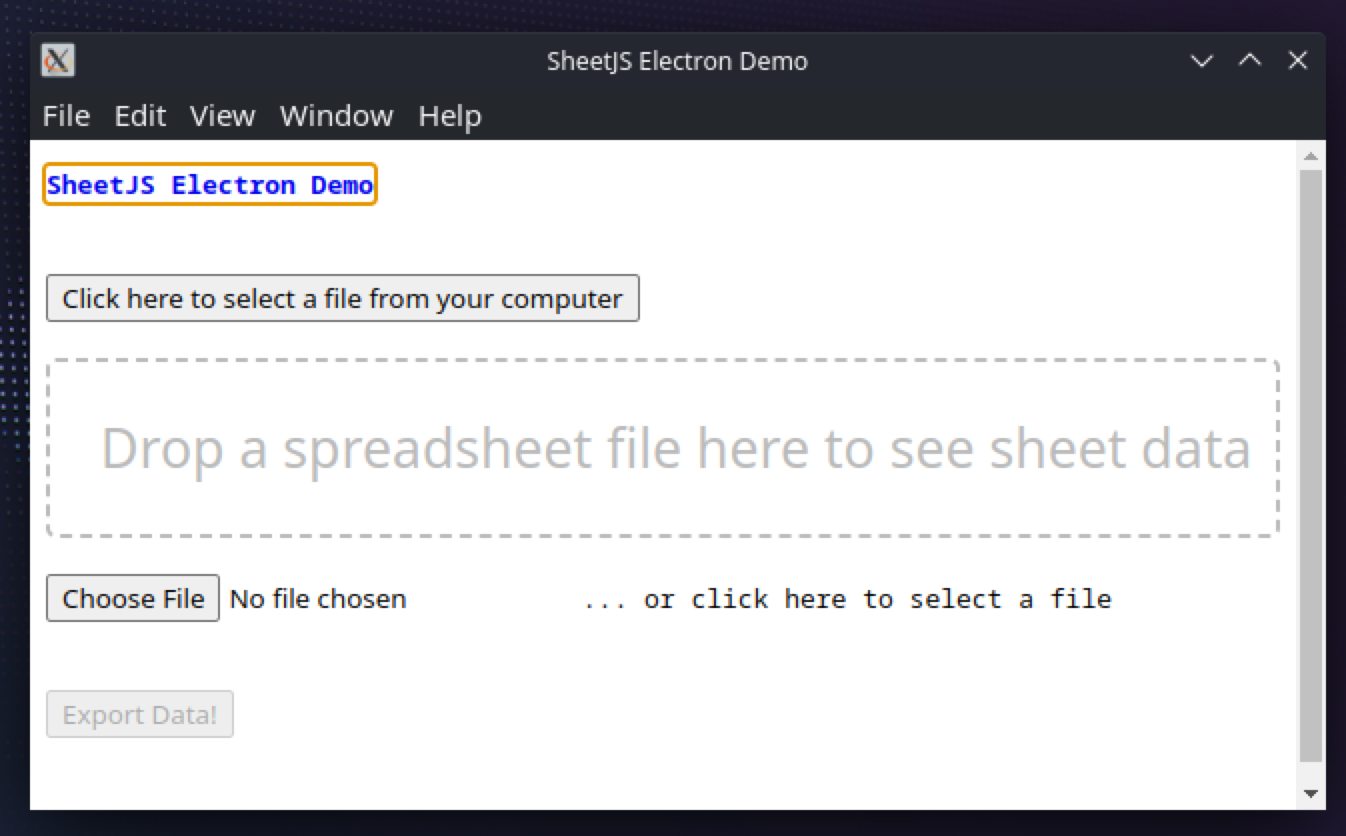
"完整示例" 部分涵盖了用于读取和写入工作簿的完整桌面应用。该应用将如下图所示:
¥The "Complete Example" section covers a complete desktop app to read and write workbooks. The app will look like the screenshots below:
| Windows | macOS | Linux |
|---|---|---|
|
|
|
集成详情
¥Integration Details
SheetJS NodeJS 模块 可以从主线程或渲染器线程导入。
¥The SheetJS NodeJS Module can be imported from the main or the renderer thread.
SheetJS readFile 和 writeFile 方法将在可用时使用 Electron fs 模块。
¥The SheetJS readFile and writeFile methods will use the Electron fs module
where available.
Renderer Configuration (click to show)
Electron 9 and later require the preference nodeIntegration: true in order to
require('xlsx') in the renderer process.
Electron 12 and later also require worldSafeExecuteJavascript: true and
contextIsolation: true.
读取文件
¥Reading Files
Electron 提供了 3 种不同的方式来读取文件,其中两种方式使用 Web API。
¥Electron offers 3 different ways to read files, two of which use Web APIs.
文件输入元素
¥File Input Element
文件输入元素自动映射到标准 Web API。
¥File input elements automatically map to standard Web APIs.
例如,假设页面上有一个文件输入元素:
¥For example, assuming a file input element on the page:
<input type="file" name="xlfile" id="xlf" />
事件处理程序将像处理 Web 事件一样处理该事件:
¥The event handler would process the event as if it were a web event:
async function handleFile(e) {
  const file = e.target.files[0];
  const data = await file.arrayBuffer();
  /* data is an ArrayBuffer */
  const workbook = XLSX.read(data);

  /* DO SOMETHING WITH workbook HERE */
}
document.getElementById("xlf").addEventListener("change", handleFile, false);
拖放
¥Drag and Drop
拖放片段 适用于页面上的 DIV 元素。
¥The drag and drop snippet applies to DIV elements on the page.
例如,假设页面上有一个 DIV:
¥For example, assuming a DIV on the page:
<div id="drop">Drop a spreadsheet file here to see sheet data</div>
事件处理程序将像处理 Web 事件一样处理该事件:
¥The event handler would process the event as if it were a web event:
async function handleDrop(e) {
  e.stopPropagation();
  e.preventDefault();

  const file = e.dataTransfer.files[0];
  const data = await file.arrayBuffer();
  /* data is an ArrayBuffer */
  const workbook = XLSX.read(data);

  /* DO SOMETHING WITH workbook HERE */
}
document.getElementById("drop").addEventListener("drop", handleDrop, false);
Electron API
XLSX.readFile 从文件系统读取工作簿。showOpenDialog 显示另存为对话框并返回选定的文件名。与 Web API 不同,showOpenDialog 流程可以由应用代码启动:
¥XLSX.readFile reads workbooks from the file system.
showOpenDialog shows a Save As dialog and returns the selected file name.
Unlike the Web APIs, the showOpenDialog flow can be initiated by app code:
/* from the renderer thread */
const electron = require('@electron/remote');

/* this function will show the open dialog and try to parse the workbook */
async function importFile() {
  /* show Save As dialog */
  const result = await electron.dialog.showOpenDialog({
    title: 'Select a file',
    filters: [{
      name: "Spreadsheets",
      extensions: ["xlsx", "xls", "xlsb", /* ... other formats ... */]
    }]
  });
  /* result.filePaths is an array of selected files */
  if(result.filePaths.length == 0) throw new Error("No file was selected!");
  return XLSX.readFile(result.filePaths[0]);
}
showOpenDialog 最初返回一个路径数组:
¥showOpenDialog originally returned an array of paths:
var dialog = require('electron').remote.dialog;

function importFile(workbook) {
  var result = dialog.showOpenDialog({ properties: ['openFile'] });
  return XLSX.readFile(result[0]);
}
该方法在 Electron 6 中被重命名为 showOpenDialogSync。
¥This method was renamed to showOpenDialogSync in Electron 6.
写入文件
¥Writing Files
XLSX.writeFile 将工作簿写入文件系统。showSaveDialog 显示另存为对话框并返回选定的文件名:
¥XLSX.writeFile writes workbooks to the file system.
showSaveDialog shows a Save As dialog and returns the selected file name:
/* from the renderer thread */
const electron = require('@electron/remote');

/* this function will show the save dialog and try to write the workbook */
async function exportFile(workbook) {
  /* show Save As dialog */
  const result = await electron.dialog.showSaveDialog({
    title: 'Save file as',
    filters: [{
      name: "Spreadsheets",
      extensions: ["xlsx", "xls", "xlsb", /* ... other formats ... */]
    }]
  });
  /* write file */
  XLSX.writeFile(workbook, result.filePath);
}
showSaveDialog 最初返回选择的路径:
¥showSaveDialog originally returned the selected path:
var dialog = require('electron').remote.dialog;

function exportFile(workbook) {
  var result = dialog.showSaveDialog();
  XLSX.writeFile(workbook, result);
}
该方法在 Electron 6 中被重命名为 showSaveDialogSync。
¥This method was renamed to showSaveDialogSync in Electron 6.
完整示例
¥Complete Example
本 demo 在以下环境下进行了测试:
¥This demo was tested in the following environments:
| 操作系统和版本 | 架构 | Electron | 日期 |
|---|---|---|---|
| macOS 15.3 | darwin-x64 | 35.1.2 | 2025-03-31 |
| macOS 14.5 | darwin-arm | 35.1.2 | 2025-03-30 |
| 视窗 11 | win11-x64 | 33.2.1 | 2025-02-11 |
| 视窗 11 | win11-arm | 33.2.1 | 2025-02-23 |
| Linux(全息操作系统) | linux-x64 | 33.2.1 | 2025-01-02 |
| Linux(Debian) | linux-arm | 33.2.1 | 2025-02-16 |
该演示包括一个拖放框以及一个文件输入框,镜像了 SheetJS 数据预览在线演示
¥This demo includes a drag-and-drop box as well as a file input box, mirroring the SheetJS Data Preview Live Demo
该演示中的核心数据是一个可编辑的 HTML 表格。读者使用 sheet_to_html(带有 editable:true 选项)构建表格,作者使用 table_to_book 抓取表格。
¥The core data in this demo is an editable HTML table. The readers build up the
table using sheet_to_html (with editable:true option) and the writers scrape
the table using table_to_book.
该演示项目已连接至 electron-forge 以构建独立的二进制文件。
¥The demo project is wired for electron-forge to build the standalone binary.
-
下载演示文件:
¥Download the demo files:
-
package.json:项目结构¥
package.json: project structure -
main.js:主进程脚本¥
main.js: main process script -
index.html:窗口页面¥
index.html: window page -
index.js:在渲染上下文中加载脚本¥
index.js: script loaded in render context
右键单击每个链接并选择 "保存链接为..."。左键单击链接将尝试在浏览器中加载该页面。目标是保存文件内容。
¥Right-click each link and select "Save Link As...". Left-clicking a link will try to load the page in your browser. The goal is to save the file contents.
这些指令可以在终端 (bash) 或命令提示符窗口中运行:
¥These instructions can be run in a Terminal (bash) or Command Prompt window:
mkdir sheetjs-electron
cd sheetjs-electron
curl -LO https://xlsx.nodejs.cn/electron/package.json
curl -LO https://xlsx.nodejs.cn/electron/main.js
curl -LO https://xlsx.nodejs.cn/electron/index.html
curl -LO https://xlsx.nodejs.cn/electron/index.js
在 PowerShell 中,命令可能会因参数错误而失败:
¥In PowerShell, the command may fail with a parameter error:
Invoke-WebRequest : A parameter cannot be found that matches parameter name 'LO'.
curl.exe 必须直接调用:
¥curl.exe must be invoked directly:
curl.exe -LO https://xlsx.nodejs.cn/electron/package.json
curl.exe -LO https://xlsx.nodejs.cn/electron/main.js
curl.exe -LO https://xlsx.nodejs.cn/electron/index.html
curl.exe -LO https://xlsx.nodejs.cn/electron/index.js
-
安装依赖:
¥Install dependencies:
npm install
-
要验证应用是否有效,请在测试环境中运行:
¥To verify the app works, run in the test environment:
npx -y electron .
应用将运行。
¥The app will run.
-
要构建独立应用,请运行构建器:
¥To build a standalone app, run the builder:
npm run make
这将在 out\make 文件夹中创建一个包和一个独立的二进制文件。
¥This will create a package in the out\make folder and a standalone binary.
在 Linux 上,打包步骤可能需要额外的依赖 [^1]
¥On Linux, the packaging step may require additional dependencies[^1]
上次在 Windows ARM 上测试演示时,生成的二进制文件面向 x64。该程序将在 ARM64 Windows 上运行。
¥When the demo was last tested on Windows ARM, the generated binary targeted x64. The program will run on ARM64 Windows.
测试
¥Testing
-
¥Download the test file
pres.numbers -
启动生成的应用:
¥Launch the generated application:
| 架构 | 命令 |
|---|---|
darwin-x64 | open ./out/sheetjs-electron-darwin-x64/sheetjs-electron.app |
darwin-arm | open ./out/sheetjs-electron-darwin-arm64/sheetjs-electron.app |
win11-x64 | .\out\sheetjs-electron-win32-x64\sheetjs-electron.exe |
win11-arm | .\out\sheetjs-electron-win32-x64\sheetjs-electron.exe |
linux-x64 | ./out/sheetjs-electron-linux-x64/sheetjs-electron |
linux-arm | ./out/sheetjs-electron-linux-arm64/sheetjs-electron |
Electron API
-
单击 "单击此处从你的计算机中选择一个文件"。使用文件选择器,导航至“下载”文件夹并选择
pres.numbers。¥Click "Click here to select a file from your computer". With the file picker, navigate to the Downloads folder and select
pres.numbers.
应用应在表格中显示数据。
¥The application should show data in a table.
-
单击 "导出数据!",然后在弹出窗口中单击 "保存"。默认情况下,它将尝试写入下载文件夹中的
Untitled.xls。¥Click "Export Data!" and click "Save" in the popup. By default, it will try to write to
Untitled.xlsin the Downloads folder.
在某些测试中,对话框没有默认名称。
¥In some tests, the dialog did not have a default name.
如果没有默认名称,则输入 Untitled.xls,然后单击 "保存"。
¥If there is no default name, enter Untitled.xls and click "Save".
导出数据后,应用将显示一个弹出窗口。在电子表格编辑器中打开文件,并将数据与应用中显示的表格进行比较。
¥The app will show a popup once the data is exported. Open the file in a spreadsheet editor and compare the data to the table shown in the application.
拖放
¥Drag and Drop
-
关闭应用,结束终端进程并重新启动(参见步骤 6)
¥Close the application, end the terminal process and re-launch (see step 6)
-
在文件资源管理器或查找器窗口中打开“下载”文件夹。
¥Open the Downloads folder in a file explorer or finder window.
-
单击
pres.numbers文件并将其从“下载”文件夹拖动到带边框的 "删除电子表格文件" 框。应显示文件数据。¥Click and drag the
pres.numbersfile from the Downloads folder to the bordered "Drop a spreadsheet file" box. The file data should be displayed.
文件输入元素
¥File Input Element
-
关闭应用,结束终端进程并重新启动(参见步骤 6)
¥Close the application, end the terminal process and re-launch (see step 6)
-
单击 "选择文件"。使用文件选择器,导航至“下载”文件夹并选择
pres.numbers。¥Click "Choose File". With the file picker, navigate to the Downloads folder and select
pres.numbers.
Electron 重大变化
¥Electron Breaking Changes
此演示的第一个版本使用了 Electron 1.7.5。当前演示包括 Electron 35.1.2 所需的更改。
¥The first version of this demo used Electron 1.7.5. The current demo includes
the required changes for Electron 35.1.2.
库中没有特定于 Electron 的解决方法,但 Electron 多次破坏了向后兼容性。变更摘要如下。
¥There are no Electron-specific workarounds in the library, but Electron broke backwards compatibility multiple times. A summary of changes is noted below.
Electron 6 更改了 dialog API 方法的返回类型。旧的 dialog 方法已重命名:
¥Electron 6 changed the return types of dialog API methods. The old dialog
methods have been renamed:
| 电子 1 - 5 | 电子 6 |
|---|---|
showOpenDialog | showOpenDialogSync |
showSaveDialog | showSaveDialogSync |
此更改未正确记录!
¥This change was not properly documented!
Electron 9 及更高版本需要优先级 nodeIntegration: true 才能在渲染器进程中使用 require('xlsx')。
¥Electron 9 and later require the preference nodeIntegration: true in order to
require('xlsx') in the renderer process.
Electron 12 及更高版本也需要 worldSafeExecuteJavascript: true 和 contextIsolation: true。
¥Electron 12 and later also require worldSafeExecuteJavascript: true and
contextIsolation: true.
Electron 14 及更高版本必须使用 @electron/remote 而不是 remote。需要调用 initialize 才能在窗口中启用开发者工具。
¥Electron 14 and later must use @electron/remote instead of remote. An
initialize call is required to enable Developer Tools in the window.
[^1]: 请参阅 Electron Forge 文档中的 "创客"。在 Linux 上,演示生成 rpm 和 deb 可分发文件。在 Arch Linux 和 Steam Deck 上,sudo pacman -Syu rpm-tools dpkg fakeroot 安装了所需的软件包。在 Debian 和 Ubuntu 上,sudo apt-get install rpm 就足够了。
¥See "Makers" in the Electron Forge documentation. On Linux, the demo generates rpm and deb distributables. On Arch Linux and the Steam Deck, sudo pacman -Syu rpm-tools dpkg fakeroot installed required packages. On Debian and Ubuntu, sudo apt-get install rpm sufficed.